
How to Bake Bacon on a Rack?
Love crispy, perfectly cooked bacon but hate the mess and uneven cooking that comes with frying it in a pan?
Baking bacon on a rack is the solution you’ve been looking for.
Learn everything about baking bacon on a rack, including why it’s the best method, required ingredients and equipment, and a step-by-step guide to achieving perfectly cooked bacon every time.
Get tips and tricks for the best results and learn how to store leftover baked bacon. Let’s get started!
Key Takeaways:
What is Baking Bacon on a Rack?
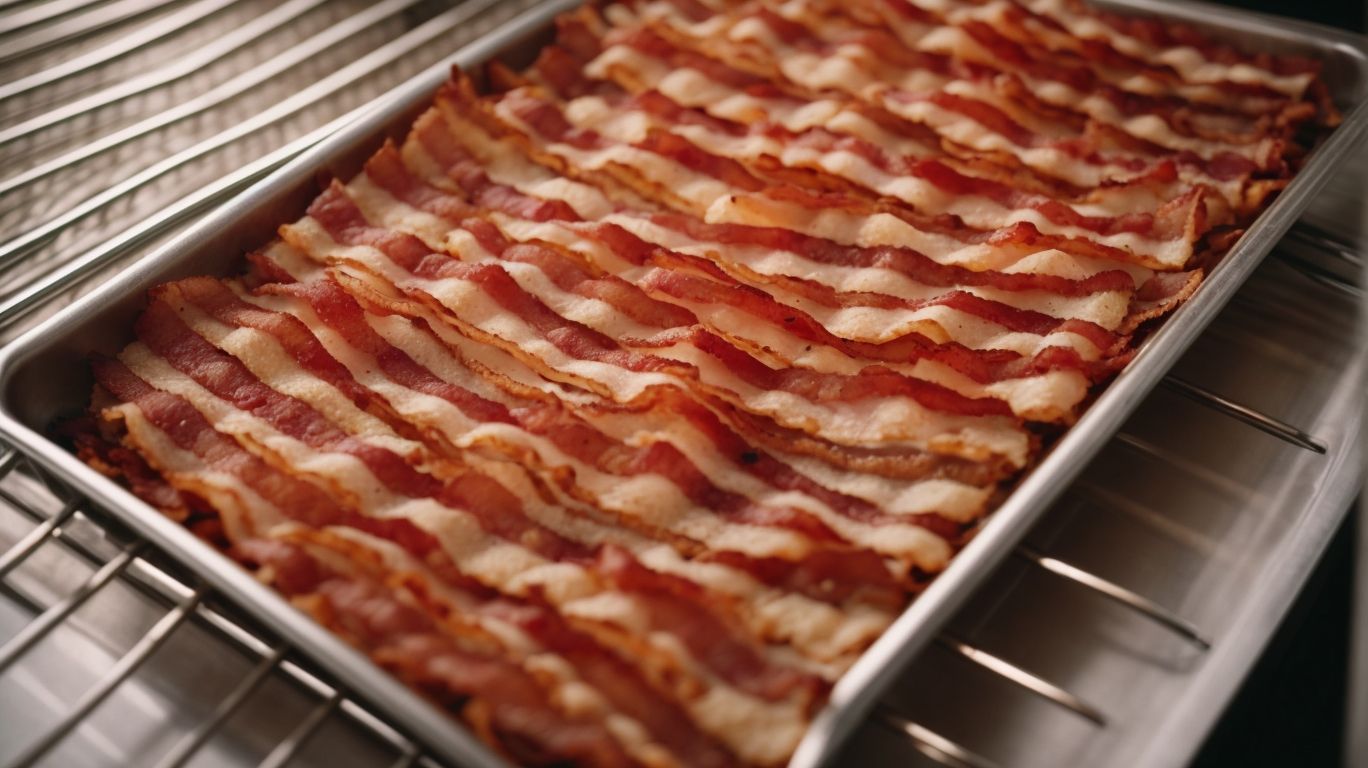
Baking bacon on a rack involves placing bacon slices on a raised platform above a baking sheet to allow air circulation and achieve a crispy texture.
Using this method offers several advantages. The elevated position of the bacon on the rack allows hot air to circulate evenly around each slice, resulting in consistent cooking and a perfectly crispy finish. The raised platform allows the excess grease released from the bacon during cooking to drip onto the baking sheet below, reducing the amount of grease the bacon absorbs and providing a healthier alternative to pan-frying. In essence, baking bacon on a rack is not only convenient but also yields delicious and evenly cooked bacon strips.
Why Should You Bake Bacon on a Rack?
Baking bacon on a rack offers several advantages, including crispy bacon slices, even cooking, and reduced grease absorption compared to traditional stovetop methods.
When you opt for this method, you’re leveraging the capabilities of the oven that allows the bacon to cook more evenly. Placing the bacon on a rack promotes airflow around each slice, ensuring that every piece gets perfectly crispy without the need to constantly flip them. This technique also prevents the bacon from sitting in its own grease, resulting in a healthier and less greasy finished product. By utilizing a rack, you are optimizing the heat distribution, allowing the bacon to become crispy and delicious all around.
What You Will Need
To bake bacon on a rack, you will need quality bacon slices, an oven for even cooking, a baking sheet for collecting drippings, and various seasonings such as pepper, maple syrup, honey, or sriracha for flavor.
When choosing bacon, opt for thick-cut varieties like applewood-smoked or honey-glazed for a delicious result. The oven should be preheated to 400°F (200°C) for optimal crispiness. Make sure to place a wire rack on the baking sheet to elevate the bacon, allowing air to circulate and prevent sogginess. Experiment with seasoning combinations like black pepper and brown sugar for a classic taste or go bold with a touch of cayenne pepper for some heat. Remember, patience is key – let the bacon cook slowly for that perfect crunch!
Ingredients
The ingredients for baking bacon on a rack typically include high-quality bacon slices, seasonings like pepper, maple syrup, honey, or sriracha, and optional additions such as shrimp, asparagus, or brussels sprouts for variety.
When selecting bacon for this dish, it’s crucial to opt for slices with a good balance of meat and fat to ensure that perfect crispiness. The seasonings mentioned not only complement the savory bacon flavor but also add a delightful kick to the dish.
Incorporating shrimp, asparagus, or brussels sprouts can bring a burst of freshness and distinctive flavors, creating a unique twist to the traditional bacon recipe. These elements not only introduce different textures but also enhance the overall taste experience.
Equipment
The necessary equipment for baking bacon on a rack includes an oven for cooking, a wire rack to elevate the bacon, a rimmed baking sheet to catch drippings, and tools for handling bacon grease safely.
To ensure a successful bacon-baking experience, it’s crucial to have a reliable oven that can maintain the desired cooking temperature consistently. The wire rack serves as a vital component, allowing heat to circulate evenly around each strip of bacon, resulting in crispy perfection. Pair that with a rimmed baking sheet to contain any sizzling drippings, preventing any potential mess in your oven. Having specialized tools like tongs or a spatula, endorsed by expert chefs Adam and Joanne, can make the process of flipping and removing the bacon easier and safer.
Step-by-Step Guide to Baking Bacon on a Rack
Mastering the art of baking bacon on a rack involves several steps, from preheating the oven to checking for perfect crispiness, ensuring each batch turns out golden brown and delicious.
To start with, preheat your oven to 400°F (200°C) and place an oven-safe wire rack inside a baking sheet lined with foil or parchment paper. This rack allows the bacon strips to cook evenly and become crispy without sitting in their own grease.
- Arrange the bacon strips in a single layer on the rack, ensuring they do not overlap.
- Bake the bacon for about 15-20 minutes, flipping the strips halfway through for even cooking.
- Watch the bacon during the last few minutes to prevent overcooking and achieve that perfect crispiness.
Once done, remove the bacon from the oven and transfer it to a paper towel-lined plate to drain excess grease before serving.
Step 1: Preheat the Oven
The first step in baking bacon on a rack is to preheat the oven to the recommended temperature, ensuring even cooking and crispy results.
Preheating the oven is a crucial step in the bacon-baking process as it allows the bacon to start cooking immediately upon being placed in the oven. This initial burst of heat helps to seal in the juices and flavors of the bacon, resulting in a more succulent and tasty outcome.
The optimal temperature for preheating the oven when baking bacon typically falls between 375°F to 400°F. This temperature range ensures that the bacon cooks through evenly without burning or becoming overly crispy. By preheating the oven to the correct temperature, you set the stage for a successful baking experience, producing bacon that is both flavorful and perfectly cooked.
Step 2: Prepare the Bacon
Preparing the bacon for baking involves arranging the bacon strips in a single layer on the rack, ensuring that each slice cooks evenly and achieves a crispy edge.
Proper spacing between the bacon strips is crucial to allow the heat to circulate evenly, leading to consistent cooking results. To enhance the flavor profile, consider sprinkling some black pepper or a hint of maple syrup before placing it in the oven. Remember to preheat the oven to the recommended temperature to jumpstart the crispy transformation. Check your bacon periodically to prevent overcooking or burning, as the edges are prone to cook faster than the centers. Patience is key to mastering the art of perfectly baked bacon!
Step 3: Arrange the Bacon on the Rack
Carefully place the bacon strips on the rack in the oven, ensuring they are positioned at the desired level for optimal crispiness based on personal preference.
To achieve the perfect crispiness, make sure the bacon strips are evenly spaced on the rack to allow air circulation all around. This ensures that each strip cooks uniformly and becomes crispy to the desired level. Remember, the distance between the bacon strips can impact the cooking process; too close together may result in uneven cooking, while too far apart might lead to inconsistent crispiness. Taking the time to arrange the bacon thoughtfully on the rack can make a notable difference in the final texture and taste.
Step 4: Bake the Bacon
Once the bacon is arranged on the rack, bake it in the preheated oven until the strips reach the perfect level of crispiness, suitable for serving a crowd or enjoying batch after batch.
Ensuring a consistent heat is crucial during the baking process to achieve that irresistible crisp texture without any burnt edges. The recommended temperature for baking bacon on a rack is around 400°F (200°C), allowing the fat to render slowly and evenly, resulting in perfectly cooked strips.
For larger quantities, consider rotating the baking sheets midway through the cooking time to ensure uniform crisping. This practice is especially beneficial when preparing bacon for a group, as it guarantees a delectable outcome across all servings.
Step 5: Check for Doneness
To ensure the bacon reaches the desired level of doneness, use a paper towel to blot excess grease, then transfer the crispy strips to a plate to cool while retaining their heat.
Once the bacon has been transferred to the plate, observe the color and texture; desired doneness can be achieved when the bacon turns golden brown and the edges are slightly crispy. To double-check, press the bacon gently with a fork; if it feels firm but still slightly tender, it’s likely done. If using a meat thermometer, the internal temperature should reach around 165°F (74°C).
Remember, residual heat will continue to cook the bacon even after being removed from heat, so factor this in while determining doneness. Letting it rest on the plate for a couple of minutes is a good idea.
Tips and Tricks for Perfectly Baked Bacon
Achieving perfectly baked bacon involves knowing how to prevent curling during cooking and the best methods for storing any leftover crispy strips.
-
Prevent curling: To ensure your bacon cooks evenly without curling, try using a heavy-duty baking sheet lined with parchment paper to provide a flat surface. Placing another baking sheet on top of the bacon while it cooks can also help maintain its shape.
-
Storing leftovers: Store any leftover bacon in an airtight container in the refrigerator for up to three days. You can also freeze cooked bacon to use in recipes later by placing it in a freezer-safe bag.
-
Incorporate flavors: Add a twist to your bacon by sprinkling brown sugar, black pepper, or smoked paprika before baking for an extra burst of flavor.
How to Prevent Bacon from Curling?
To prevent bacon from curling while baking, consider adjusting the oven temperature and ensuring the edges are properly positioned on the rack to reduce the risk of uneven cooking or burning.
One effective way to ensure your bacon stays flat during baking is to start with cold bacon strips. Placing them in the freezer for a few minutes can slightly firm up the fat, helping to maintain their shape. Additionally, disposing of excess fat that accumulates on the baking sheet can prevent the bacon from swimming in its own grease, thus reducing the chances of curling. Spacing out the bacon strips on the rack allows for proper air circulation and even cooking, resulting in crispy, flat bacon slices.
How to Store Leftover Baked Bacon?
For storing leftover baked bacon, place the crispy strips in an airtight container and refrigerate them to maintain their texture and flavor for later enjoyment.
Choosing the right container is crucial; opt for one that seals tightly to prevent any exposure to air, which can cause the bacon to become soggy and lose its crispiness.
It’s also recommended to line the container with parchment paper or foil to absorb excess moisture and help preserve the bacon’s texture.
When refrigerating, ensure the temperature is set below 40°F (4°C) to keep the bacon fresh and safe for consumption.
Conclusion
Baking bacon on a rack is a foolproof method to achieve perfect crispiness, minimize bacon grease absorption, and enjoy effortlessly cooked bacon slices from the oven.
By elevating the bacon on a rack while baking, the rendered fat drips away, resulting in bacon slices that are beautifully crispy without being greasy. This method not only ensures a more even cooking process but also reduces the need for bacon to sit in its own grease, making it a healthier alternative. Using a rack allows hot air to circulate around the bacon, aiding in achieving that ideal balance of crunchy texture and juicy flavor.
Frequently Asked Questions
What is the best way to bake bacon on a rack?
The best way to bake bacon on a rack is to preheat your oven to 400°F, place the bacon on a wire rack set over a baking sheet, and bake for 15-20 minutes, flipping halfway through.
Why should I bake bacon on a rack instead of a traditional pan?
Baking bacon on a rack allows the fat to drip away from the bacon, resulting in a crispy and less greasy end product. It also allows for even cooking and less splattering.
Can I use any type of wire rack for baking bacon?
It is best to use a wire rack specifically designed for baking, as they are typically non-stick and have a tighter mesh to prevent the bacon from falling through. However, if you do not have one, you can use a cooling rack or create a makeshift rack with aluminum foil.
How do I prevent the bacon from sticking to the rack?
To prevent the bacon from sticking to the rack, you can lightly coat the rack with cooking spray or oil before placing the bacon on top. You can also line the rack with parchment paper.
What is the optimal temperature and time for baking bacon on a rack?
The optimal temperature for baking bacon on a rack is 400°F. The baking time will vary depending on the thickness of the bacon, but it typically takes 15-20 minutes. It is recommended to check on the bacon periodically to prevent burning.
Can I use the bacon drippings from baking on a rack for other recipes?
Yes, the bacon drippings can be used for other recipes, such as adding flavor to vegetables or using as a cooking oil. Just be sure to strain the drippings first to remove any burnt bits.