
How to Bake Dry Under Eyes?
Are you looking to achieve flawless under eyes with a baking technique?
In this article, we will explore the art of baking in makeup, specifically focusing on how to bake dry under eyes.
We’ll guide you through the products you need and how to prepare your under eyes for baking, ensuring a flawless finish. Stay tuned for tips and tricks to hydrate, set, and enhance your under eyes. Let’s get started!
Key Takeaways:
What is Baking in Makeup?
Baking in makeup refers to a technique where setting powder is applied to the skin to set liquid products, such as foundation and concealer, creating a flawless and long-lasting finish.
This method is widely used in the makeup industry for its ability to lock in the foundation and concealer, preventing creasing and ensuring a smooth base throughout the day. The process involves allowing the heat from the skin to set the products before brushing off the excess powder, revealing a more defined and radiant complexion.
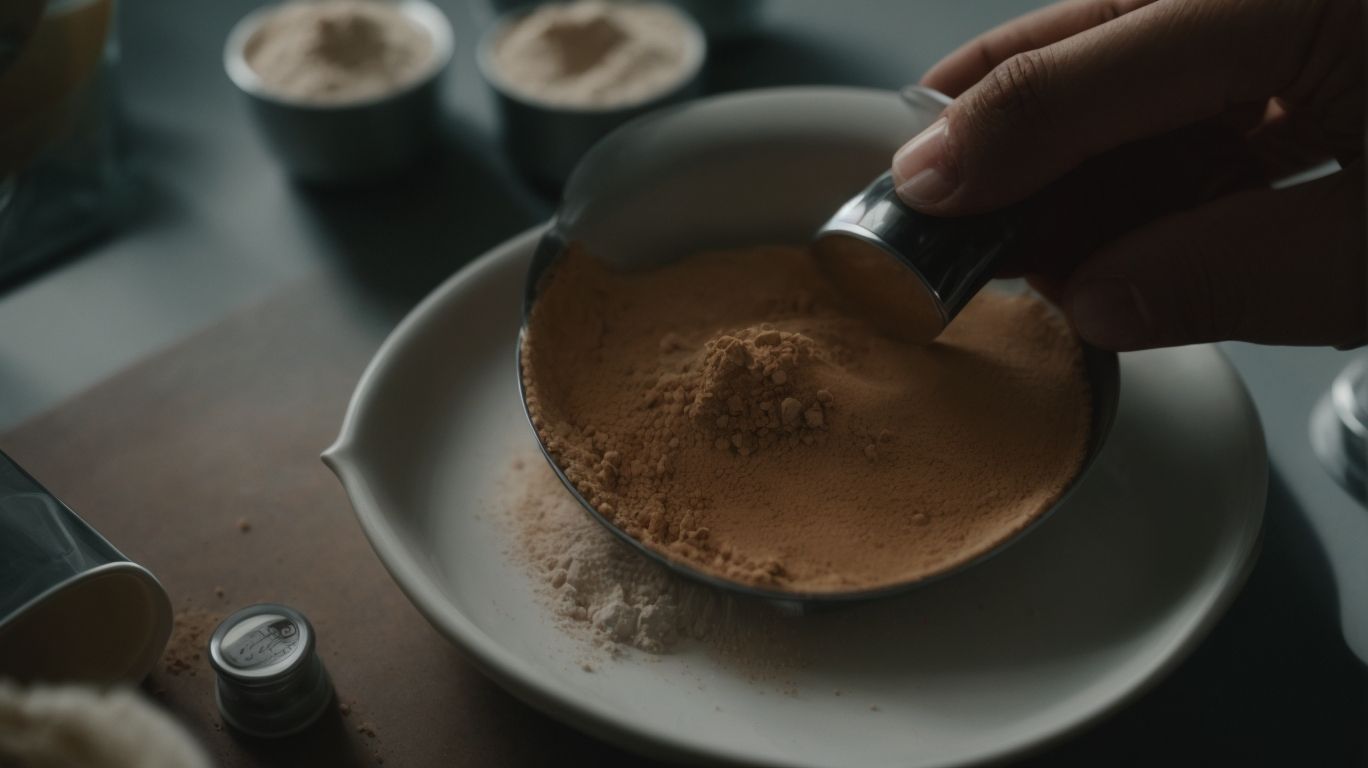
What Products Do You Need for Baking?
To successfully bake your makeup, you will need essential products like setting powder, concealer, foundation, and a fluffy brush that cater to your skin type and tone.
In terms of selecting the specific makeup products for baking, it’s crucial to consider the unique needs of your skin.
Choosing the right setting powder is a game-changer, as it helps lock in your foundation and concealer for a flawless finish. For oily skin, opt for oil-absorbing powders, while dry skin benefits from more hydrating options.
Concealers should match your skin tone and have a creamy texture for easy blending. High-quality foundations, like those from Giorgio Armani or Urban Decay, provide long-lasting coverage without feeling heavy.
How to Prepare Your Under Eyes for Baking
Credits: Poormet.Com – Gerald Carter
Preparing your under eyes for baking involves applying hydrating products like eye cream, moisturizer, and primer to create a smooth base that helps prevent creasing and enhances the longevity of your makeup.
Properly hydrating the delicate under-eye area is crucial as it can be prone to dryness and fine lines, which can be accentuated by makeup application. By using a rich eye cream or a gentle moisturizer specific for the eye area, you provide essential moisture and nourishment.
After hydrating, applying a primer designed for the under eyes further smoothes the skin’s texture, blurring any imperfections and ensuring that the concealer and setting powder adhere well. Products like the Tatcha Silk Canvas Eye Primer or the Cle de Peau Beaute Enhancing Eye Contour Cream Supreme are excellent choices known for their hydrating and long-lasting properties.
What Are the Benefits of Baking Your Under Eyes?
Baking your under eyes can brighten your complexion, set your makeup for a flawless finish, and keep your under-eye area creaseless throughout the day.
One of the key advantages of using the baking technique for the under-eye area is its ability to significantly enhance the brightness of the skin. By allowing the setting powder to ‘bake’ on the skin, it creates a highlighted effect, making the under-eye area appear more awake and radiant.
This method helps to improve the longevity of your makeup. The baking process sets the concealer and foundation in place, preventing it from creasing or wearing off throughout the day. This means that your makeup stays fresh and intact for longer periods, even in hot and humid conditions.
Baking can prevent creasing in the delicate under-eye area. By applying a generous amount of setting powder and letting it sit for a few minutes before dusting it off, you create a smooth and creaseless base that ensures a flawless finish with no visible lines or creases.
Step-by-Step Guide to Baking Dry Under Eyes
Credits: Poormet.Com – Aaron Sanchez
Achieving a flawless look with dry under eyes involves a step-by-step process that includes moisturizing, color correcting, selecting the right concealer, setting with loose powder, and letting it ‘bake’ for a few minutes.
Moisturizing is essential to prep the under-eye area, as dryness can accentuate fine lines. Opt for a hydrating eye cream containing hyaluronic acid or ceramides to nourish the delicate skin.
Next, apply a peach or orange color corrector to neutralize dark circles. Gently tap and blend with your ring finger for a seamless finish.
Choose a concealer that is one to two shades lighter than your skin tone to brighten the under-eye area. Pat the product with a damp beauty sponge to prevent creasing.
Using a fluffy brush, dust a translucent loose powder under the eyes. Allow it to ‘bake’ for 5-10 minutes to set the concealer and absorb excess oil.
Moisturize Your Under Eyes
Start the baking process by moisturizing your under-eyes with a hydrating eye cream to ensure a smooth and well-prepped canvas for makeup application.
Moisturizing the delicate under-eye area is crucial before moving on to baking, as this step not only provides hydration but also helps in creating a plump, luminous skin base.
- Choosing the right eye cream is key; opt for products enriched with ingredients like hyaluronic acid, vitamin E, or peptides to deeply nourish and revitalize the thin skin under the eyes.
- Implementing a quality eye cream before baking can aid in reducing the appearance of fine lines, puffiness, and dark circles, resulting in a more even and radiant complexion once makeup is applied.
Apply a Color Corrector
After moisturizing, apply a color corrector to neutralize any dark circles or discoloration under the eyes, creating a more even base for concealer and powder application.
Color correctors play a crucial role in makeup application by counteracting specific skin concerns. The key is to choose the right shade to address your particular discoloration. For instance,
- peach correctors work wonders in canceling out dark circles,
- green correctors are ideal for covering redness,
- For those struggling with sallowness, lavender correctors can help brighten the complexion.
By applying the corrector before your concealer, you can achieve a flawless finish that looks natural and well-blended.
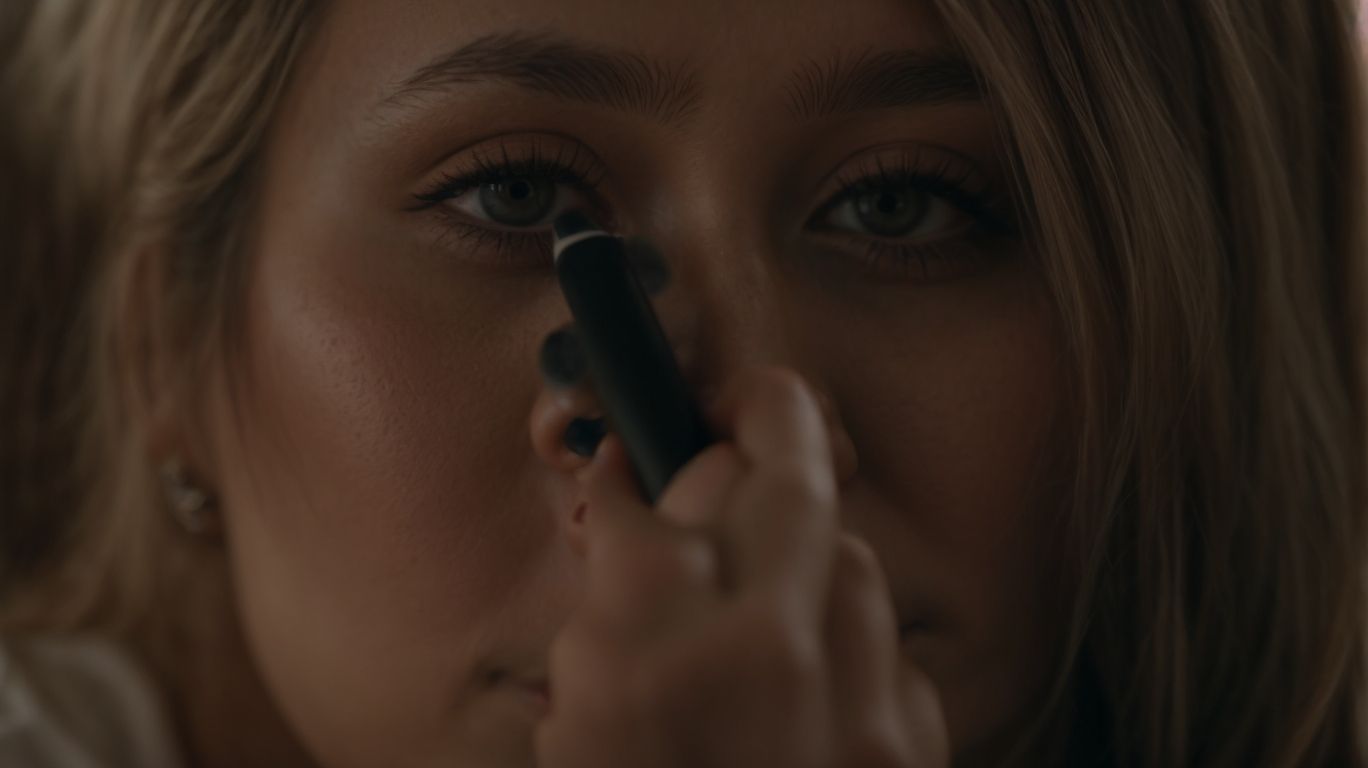
Choose the Right Concealer
Select a high-quality concealer that matches your skin tone and provides ample coverage for the under-eye area to conceal any imperfections and brighten the skin.
In terms of choosing an ideal concealer, one key factor to keep in mind is the undertone of the product, ensuring it complements your natural skin tone to avoid any mismatched patches.
Shade matching is crucial as it creates a seamless look, making your under-eye area appear revitalized and fresh. Reputable brands such as YSL Beauty and Dermablend offer a wide range of shades suitable for various skin tones, providing options for every individual’s unique complexion needs. It’s essential to test the concealer on your skin before purchasing to find the perfect match that blends effortlessly for a flawless finish.
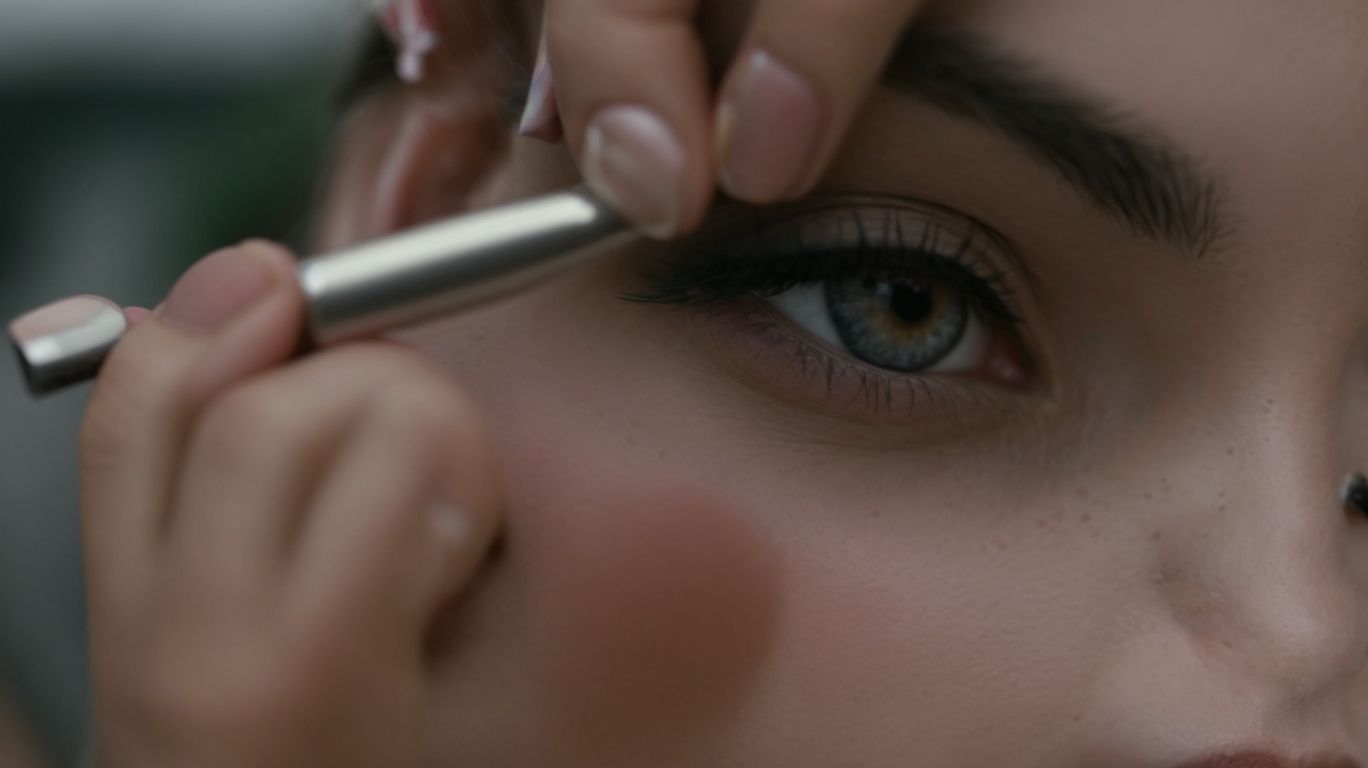
Set Your Under Eyes with Powder
Using a fluffy brush, set your under eyes with a translucent or tinted loose powder to lock in the concealer and prevent it from creasing throughout the day.
Setting the under eyes with powder is a vital step in the makeup routine, especially for those with oily skin or fine lines around the eyes. This technique, commonly referred to as ‘baking,’ helps to absorb excess oils and moisture, providing a matte finish and prolonging the wear of your makeup.
When choosing a powder for this purpose, opt for finely-milled options like IT Cosmetics Bye Bye Pores or Ami Colé Soft-Focus Powders. These products are designed to blur imperfections and give a smooth appearance to the under-eye area.
To ensure a creaseless finish, gently press the powder onto the concealed areas using a damp beauty sponge, allowing it to set for a few minutes before dusting off the excess with a fluffy brush. This technique locks in the concealer without settling into fine lines or creases, leaving you with a flawless under-eye area all day long.
Let the Powder ‘Bake’ for 5-10 Minutes
Allow the loose powder to bake on your under eyes for 5-10 minutes to let the heat from your skin set the makeup and create a flawless, long-lasting finish.
By letting the powder ‘bake’ on your skin, you are essentially allowing the product to meld with your foundation and natural oils, resulting in a seamless blend. This technique not only helps to lock in your makeup but also gives a more airbrushed appearance by setting it in place. The ideal duration of 5-10 minutes is crucial as it gives the powder enough time to absorb excess oils and create a smooth, creaseless look.
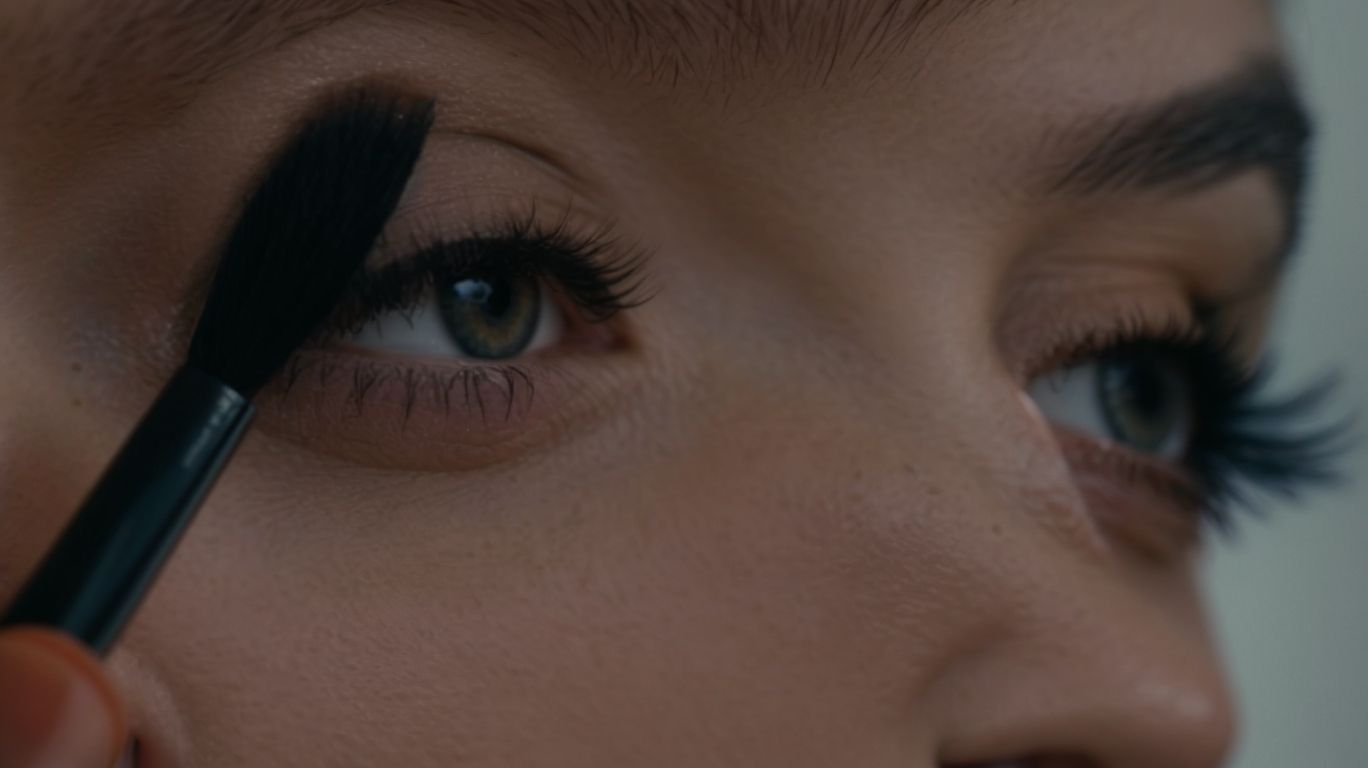
Dust Off Excess Powder
Gently dust off any excess powder with a fluffy brush to reveal a creaseless and seamless under-eye area with a flawless finish.
Using a fluffy brush for this step is crucial as it helps delicately remove any remaining loose powder without disrupting the carefully set makeup underneath. The soft bristles of the brush ensure a gentle touch on the delicate under-eye skin, preventing any harsh lines or smudges. By lightly sweeping away the excess powder, you not only achieve a smooth and radiant look but also prevent any buildup of product that can lead to creasing throughout the day.
Tips for Baking Dry Under Eyes
Credits: Poormet.Com – Kenneth White
Enhance your baking technique with tips like using a hydrating setting spray, avoiding prolonged baking, and opting for talc-free powders to prevent dryness and achieve a flawless finish.
In terms of improving the baking process for dry under eyes, it’s crucial to not only use the right products but also master the technique. Investing in quality products like Saie or Rare Beauty can work wonders for achieving optimal results. These products are formulated to provide hydration and a smooth finish, perfect for addressing dryness around the eyes.
Product choice is only one part of the equation. Technique refinement is key for a seamless makeup application. Properly blending the baking powder, setting it for just the right amount of time, and gently dusting off the excess can make a significant difference in how well your makeup sets and lasts throughout the day.
Use a Hydrating Setting Spray
After baking your makeup, spritz a hydrating setting spray to lock in moisture, enhance the longevity of your look, and maintain a fresh and dewy finish.
Hydrating setting sprays play a crucial role in revitalizing your skin post-baking by adding an extra layer of hydration, preventing your makeup from looking dry or cakey. Brands like Maybelline and NYX Professional Makeup offer excellent options that not only set your makeup but also infuse moisture into your skin.
By incorporating a hydrating setting spray into your makeup routine, you can achieve a luminous, youthful glow while ensuring that your makeup stays put throughout the day or evening without the need for frequent touch-ups.
Avoid Baking for Too Long
To prevent dryness and cakey makeup, avoid baking your under eyes for an extended period, as shorter durations of 5-10 minutes are sufficient for effective setting and flawless results.
If you notice any creasing or excessive dryness during the baking process, it’s a clear sign to stop immediately. Over-baking can strip your skin of its natural oils and lead to a dull complexion. Consider using a finely milled loose powder for a lighter application, which helps in avoiding the heavy, ‘over-baked’ look. To maintain a natural and comfortable makeup appearance throughout the day, opt for setting sprays or facial mists to refresh and hydrate the skin without disrupting your makeup.
Choose a Talc-Free Powder
Opt for talc-free powders when baking to avoid potential skin irritations, maintain a smooth finish, and achieve a flawless makeup look that lasts throughout the day.
While talc has been a common ingredient in many powders, its potential link to health concerns has led to the rise in popularity of talc-free alternatives. By using talc-free powders like those from brands such as Catrice and pairing them with the right tools like the Pinnacle Foundation Brush, you not only safeguard your skin but also ensure a creaseless and comfortable makeup application.
These products are designed to provide a lightweight and breathable texture, allowing your makeup to stay put without caking or settling into fine lines. So, make the switch to talc-free options for a seamless and long-lasting makeup finish!
Conclusion: Achieving Flawless Under Eyes with Baking
Mastering the art of baking for your under eyes can lead to a flawless finish, creaseless under-eye area, and long-lasting makeup that enhances your overall look.
In terms of achieving that flawless under-eye finish through baking, it’s essential to understand the benefits that this technique offers. By setting your concealer and foundation with translucent powder, you create a smooth, crease-free base that prevents makeup from settling into fine lines.
Proper product selection plays a crucial role in this process. Opt for a finely milled, translucent powder that matches your skin tone to avoid any white cast or flashback in photos.
Equally important is the application method. Use a damp beauty sponge to press the powder gently onto the under-eye area and leave it to ‘bake’ for a few minutes before dusting off the excess. This ensures a flawless finish that lasts all day!
Frequently Asked Questions
1. How to Bake Dry Under Eyes?
To bake dry under eyes, start by applying a hydrating eye cream to moisturize the area. Then, lightly dust a translucent powder on your under eye area and let it sit for 5-10 minutes. Finally, use a fluffy brush to dust off the excess powder for a smooth and flawless finish.
2. Why is baking a popular technique for under eye makeup?
Baking is a popular technique because it helps set your makeup, specifically in the delicate under eye area, for a longer-lasting and crease-free finish. It also helps brighten and blur any fine lines or imperfections.
3. Can baking dry under eyes cause irritation?
It is important to use a gentle and finely-milled powder when baking under eyes to avoid any irritation. Also, be sure to moisturize the area beforehand to prevent any dryness or discomfort.
4. How long should I leave the powder on for when baking under eyes?
The recommended time for leaving the powder on is 5-10 minutes. However, if you have dry skin, you may want to reduce the time to avoid excess drying.
5. Can I bake under eyes if I have oily skin?
Yes, baking can be beneficial for those with oily skin as it helps control excess oil and keeps your makeup in place for longer. Just be sure to use a light hand and tap off any excess powder to avoid a heavy and cakey look.
6. Is baking under eyes suitable for all skin types?
Baking can work for all skin types, but it is best to use a hydrating eye cream and a light hand with the powder for those with dry or sensitive skin. For oily skin, be sure to use a finely-milled powder and tap off the excess to prevent a heavy look.