

How to Bake Pumpkin Seeds?
Are you looking for a delicious and nutritious snack to enjoy this fall? Look no further than baked pumpkin seeds!
We explore the benefits of eating pumpkin seeds, different ways to prepare them, the best seasonings to use, and how to bake them to perfection.
From harvesting and cleaning the seeds to storing them for later, we’ve got you covered with all the tips and tricks you need to make the most out of this seasonal treat.
So, grab your pumpkin and let’s get baking!
Key Takeaways:
Why Bake Pumpkin Seeds?
Credits: Poormet.Com – Kevin Flores
Baking pumpkin seeds offers a delicious and nutritious snack option that is easy to prepare and can be customized with various seasonings and flavors, making it a versatile treat for any occasion.
Rich in essential nutrients like magnesium, zinc, and fiber, pumpkin seeds are not only tasty but also provide numerous health benefits.
Preparing them at home is a simple process that involves cleaning, drying, and seasoning the seeds before baking.
From savory options like garlic parmesan and spicy cajun to sweet combinations like cinnamon sugar and maple syrup, the flavor possibilities are endless.
What Are the Benefits of Eating Pumpkin Seeds?
Eating pumpkin seeds provides numerous health benefits, as they are rich in essential nutrients such as zinc and iron, which are vital for supporting immune function, promoting heart health, and enhancing overall well-being.
Consuming pumpkin seeds on a regular basis can significantly improve your immune system due to their high zinc content. Zinc plays a crucial role in immune response and helps in fighting off infections. The iron found in pumpkin seeds supports the production of healthy red blood cells, promoting cardiovascular health.
The omega-3 fatty acids in pumpkin seeds can help reduce inflammation in the body, potentially lowering the risk of chronic diseases. Their high magnesium content is beneficial for muscle relaxation and energy production, aiding in overall well-being.
What Are the Different Ways to Prepare Pumpkin Seeds?
There are several methods to prepare pumpkin seeds, including roasting, seasoning, and incorporating them into various recipes to enhance their flavor and texture for a delightful culinary experience.
In terms of roasting pumpkin seeds, the process is simple yet rewarding. Start by cleaning the seeds thoroughly, removing any pulp or fibers, then spread them out on a baking sheet. Preheat your oven to around 300°F and roast the seeds for 20-30 minutes until they turn golden brown, stirring occasionally for even cooking. For an added touch of flavor, consider seasoning the roasted pumpkin seeds with a mix of salt, spices, or even a drizzle of olive oil before popping them back into the oven for a few extra minutes.
How to Prepare Pumpkin Seeds for Baking?
Credits: Poormet.Com – Philip Gonzalez
Preparing pumpkin seeds for baking involves harvesting, cleaning, drying, and seasoning the seeds before spreading them on a sheet pan for even roasting and achieving a crispy texture.
After harvesting a pumpkin, you’ll want to separate the seeds from the pulp. Begin by rinsing the seeds under cold water to remove any remaining pumpkin pieces. Then, lay them out in a single layer on a clean cloth or paper towel to dry. Once they are dry, preheat your oven to 300°F.
Next, transfer the seeds to a bowl and toss them with a light coat of olive oil or melted butter. Sprinkle salt or your choice of seasoning, such as paprika or garlic powder, over the seeds and mix well. Spread the seasoned seeds onto a sheet pan in an even layer.
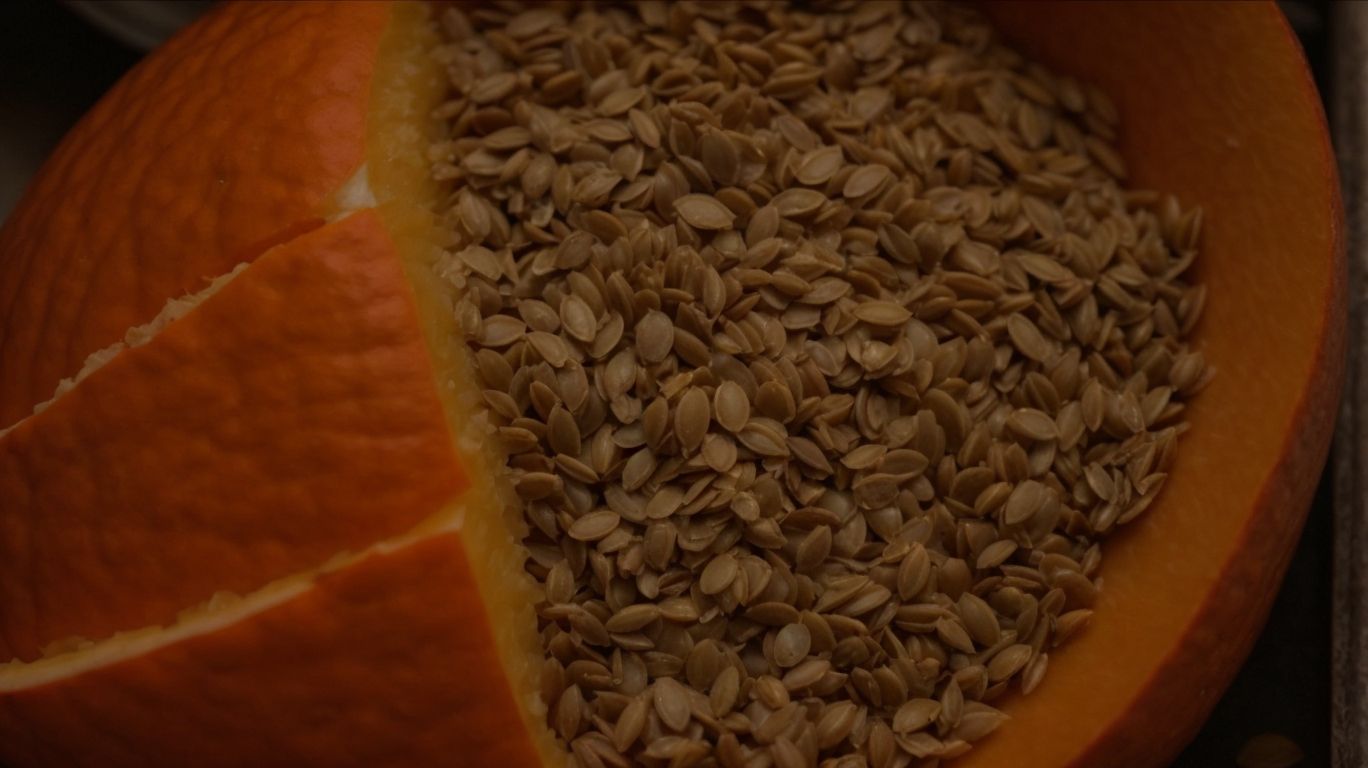
Step 1: Harvesting and Cleaning the Seeds
To begin the preparation process, harvest the pumpkin seeds, place them in a bowl of water, and rinse thoroughly to remove any traces of pumpkin flesh before proceeding to the next steps.
It is essential to ensure that the seeds are submerged in the water and that you use your hands to rub them gently. This step helps loosen the flesh attached to the seeds and makes it easier to clean them thoroughly. After rinsing, you may notice some additional pieces of pumpkin flesh floating in the water; make sure to remove these as well. Once you have completed this rinsing process, you can move on to drying the seeds before seasoning or roasting them for a delicious snack.
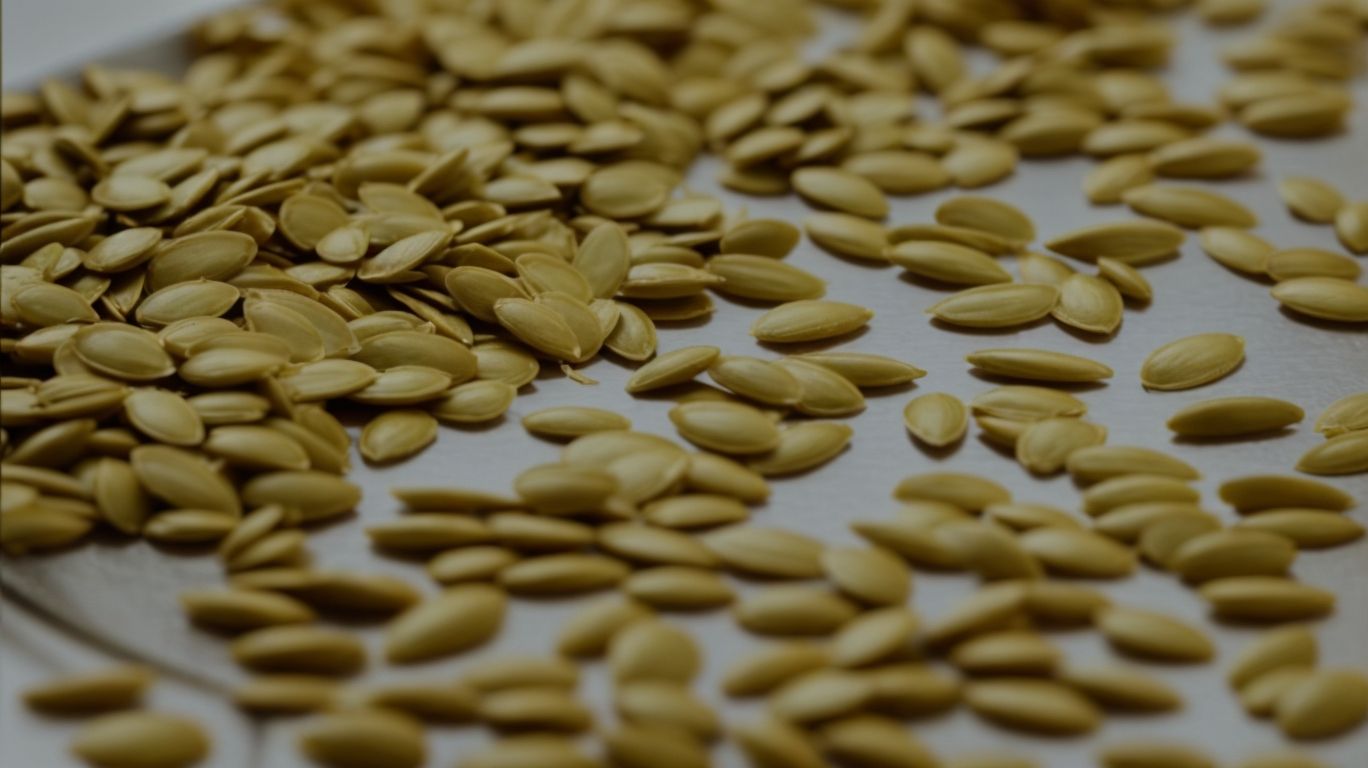
Step 2: Drying the Seeds
After cleaning, dry the pumpkin seeds by spreading them on a layer of aluminum foil to remove excess moisture and prepare them for seasoning and baking to achieve a crispy texture.
Drying pumpkin seeds effectively is crucial to ensure they turn out crispy and delicious. By using aluminum foil, you create a barrier that helps absorb the moisture from the seeds, allowing them to dry evenly and thoroughly. This process is essential as any remaining moisture can lead to chewy or soggy seeds. Laying out the seeds individually on the foil prevents them from sticking together, ensuring each seed gets properly dried and seasoned. Once the seeds are dried, they are ready to be seasoned with your favorite spices and baked to perfection.
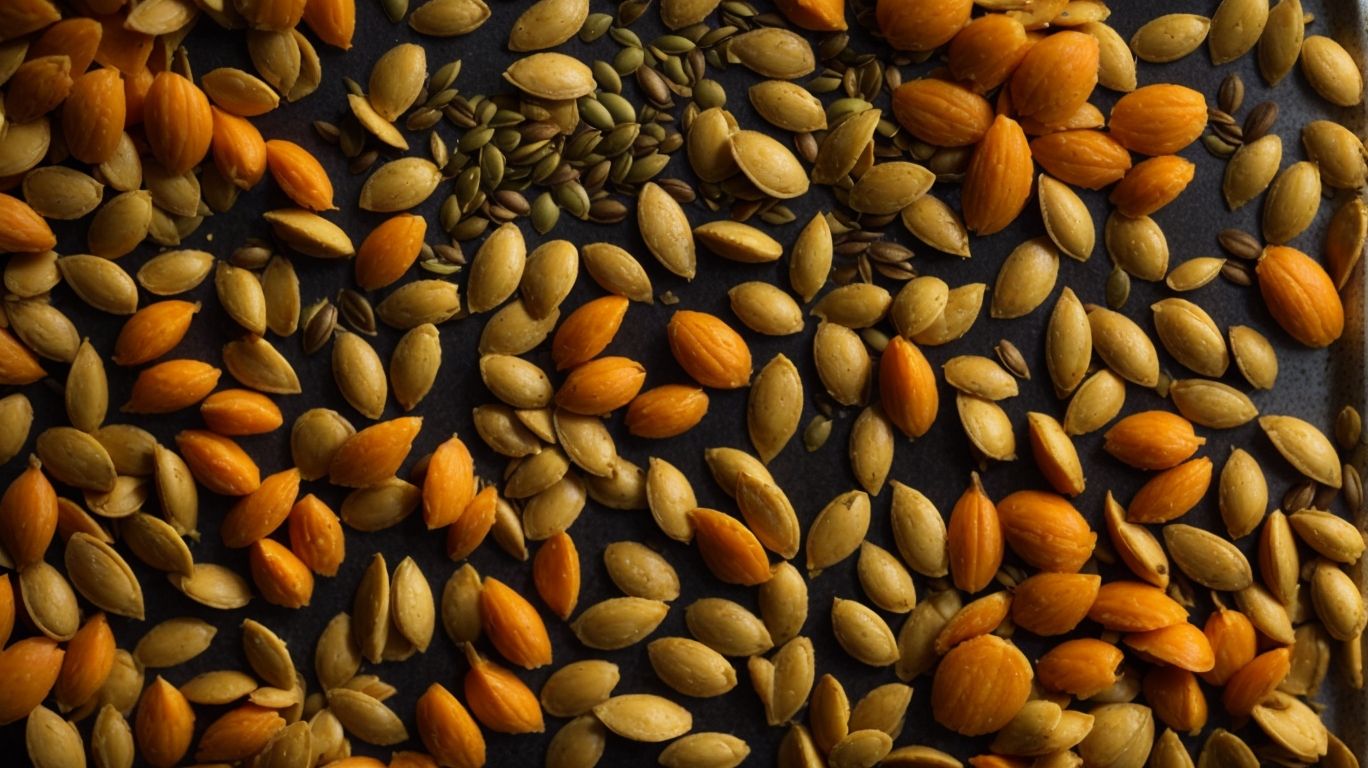
Step 3: Seasoning the Seeds
Season the dried pumpkin seeds with a mixture of salt, oil, and preferred seasonings to enhance their flavor profile before spreading them on a sheet pan for baking and achieving a crispy texture.
Start by preheating your oven to an optimal temperature for roasting the seeds evenly. In a bowl, combine the pumpkin seeds with a drizzle of oil, ensuring each seed is coated for crispiness. Then, sprinkle salt evenly to bring out the natural flavors and add a pinch of your desired seasonings for a personalized touch. Consider options like garlic powder, paprika, or even a hint of cayenne for a spicy kick.
Make sure to toss the seasoned pumpkin seeds thoroughly to distribute the flavors evenly. Spread them out on a parchment-lined sheet pan in a single layer, allowing space between the seeds for proper airflow during baking. This ensures each seed becomes crunchy and golden brown without sticking together.
What Are the Best Seasonings for Baked Pumpkin Seeds?
Credits: Poormet.Com – Joe Nguyen
The best seasonings for baked pumpkin seeds range from sweet options like cinnamon sugar to savory choices like garlic Parmesan, offering a variety of flavors to cater to different preferences and taste profiles.
For those with a sweet tooth, consider experimenting with maple syrup and a pinch of nutmeg for a warm and comforting flavor. Alternatively, spice lovers can try a mix of cayenne pepper, smoked paprika, and a sprinkle of sea salt for a kick of heat. Herb enthusiasts may enjoy a blend of rosemary, thyme, and a touch of lemon zest for a fresh and fragrant twist.
Sweet Options:
Sweet options for baked pumpkin seeds include cinnamon sugar, honey, and maple syrup, providing a delightful and indulgent twist to this nutritious snack for those with a sweet tooth.
When creating your sweet pumpkin seed treats, you can experiment with different ratios of cinnamon sugar to achieve the perfect balance between warmth and sweetness. The aromatic blend of cinnamon paired with the caramelized notes of sugar adds a comforting layer of flavor to the crunchy seeds.
For a gooey and sticky coating, drizzling honey over your baked pumpkin seeds before they crisp up in the oven can result in a luscious and golden finished product. The natural sweetness of honey complements the earthy undertones of the seeds beautifully.
Alternatively, if you prefer a rich and robust sweetness, maple syrup offers a complex and deeply satisfying flavor profile to your pumpkin seeds. Its caramel-like notes bring a decadent touch to this simple snack, appealing to those craving a more luxurious treat.
Savory Options:
Savory options for baked pumpkin seeds include garlic Parmesan, ranch, and Cajun seasoning, adding a savory and flavorful kick to this crunchy snack that satisfies savory cravings.
In terms of choosing the right seasoning for your baked pumpkin seeds, the possibilities are endless. For a classic and indulgent flavor profile, garlic Parmesan creates a rich and cheesy coating that elevates the nuttiness of the seeds. On the other hand, ranch seasoning offers a tangy and herby kick that balances the earthy taste of the pumpkin seeds perfectly.
If you’re looking to spice things up, Cajun seasoning brings a bold and zesty twist to the crunchy snack, infusing it with a mix of aromatic spices that tingle your taste buds with each bite. Test Kitchen Tip: Experiment with different seasoning combinations to find your perfect savory match for baked pumpkin seeds!
How to Bake Pumpkin Seeds?
Credits: Poormet.Com – Nicholas Sanchez
Baking pumpkin seeds is a simple process that involves preheating the oven, spreading the seasoned seeds on a baking sheet, and baking them to golden perfection for a crispy and satisfying snack.
To start, preheat the oven to 300°F to ensure that the seeds bake evenly without burning. While the oven is heating up, clean the seeds by removing any remaining pumpkin fibers. Once the seeds are clean and dry, place them in a bowl and toss with olive oil, salt, and any desired seasonings such as garlic powder or paprika. After spreading the seeds on a baking sheet in a single layer, bake them for about 25-30 minutes, stirring occasionally to guarantee an even bake. Let the seeds cool before enjoying your delicious homemade snack!
Step 1: Preheating the Oven
Start the baking process by preheating the oven to the recommended temperature, ensuring that the sheet pan is ready to receive the seasoned pumpkin seeds for even roasting and crispiness.
Preheating the oven to the right temperature is crucial for achieving perfectly roasted pumpkin seeds. Most recipes suggest a temperature of around 300-350°F, which allows the seeds to cook through without burning. Take the time to preheat the oven properly; this ensures that the seeds start roasting immediately upon entering the oven.
While the oven is preheating, prepare the sheet pan by lightly greasing or lining it with parchment paper. A well-prepared sheet pan will prevent the seeds from sticking and help with easy cleanup afterwards.
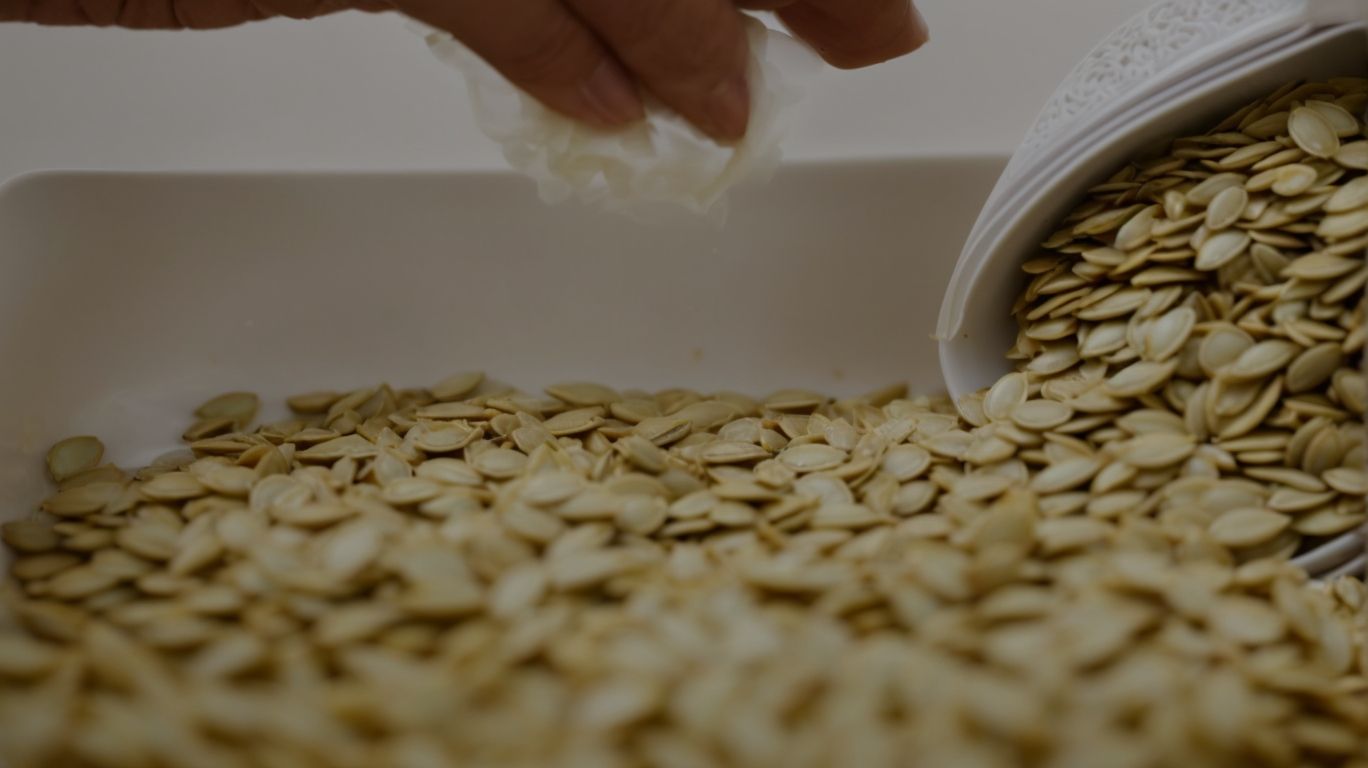
Step 2: Spreading the Seeds on a Baking Sheet
Spread the seasoned pumpkin seeds evenly on a baking sheet, following a Test Kitchen Tip to create a single layer that allows for consistent baking and ensures the development of a crispy texture.
To achieve an ideal result, avoid overcrowding the seeds, as this can lead to uneven baking and unpleasant chewiness. By ensuring adequate spacing, each seed gets the right amount of heat exposure, promoting a uniformly crispy finish. This not only enhances the overall taste but also contributes to a visually appealing presentation. Consider rotating the baking sheet halfway through the baking process to guarantee that all seeds are evenly cooked. These small adjustments can make a significant difference in the texture and flavor of your roasted pumpkin seeds.
Step 3: Baking the Seeds
Bake the seasoned pumpkin seeds in the preheated oven until golden brown and crispy, ensuring to monitor the baking process to achieve the desired flavor intensity and texture for a delightful snacking experience.
It is crucial to keep a close eye on the seeds towards the end of the baking time, as they can quickly go from perfectly golden to overdone. This final step is where the magic happens, transforming raw seeds into a crunchy, flavorful treat. The aroma wafting through your kitchen as the seeds reach that ideal crispiness is a sure sign that they are ready. Once you achieve that satisfying crunch with a hint of your preferred flavors, you can take them out of the oven and let them cool before indulging in these tasty, nutritious snacks.
How to Store Baked Pumpkin Seeds?
Storing baked pumpkin seeds in an airtight container at room temperature or in the refrigerator helps maintain their freshness and crunchy texture for an extended period, ensuring a tasty and convenient snack option.
When storing these nutritious seeds, it’s crucial to keep them away from moisture and direct sunlight, which can compromise their quality. Proper storage in a cool, dry place not only extends their shelf life but also safeguards their flavor profile.
Whether you opt for room temperature or the refrigerator, the storage location should remain consistent to prevent fluctuations that could affect the seeds. Remember, airtight containers are your best friends when it comes to preserving the optimal taste and texture of your baked pumpkin seeds.
What Is the Best Way to Store Baked Pumpkin Seeds?
The best way to store baked pumpkin seeds is to cool them completely, then transfer to an airtight container, and store in a cool, dry place or the refrigerator to retain their crispiness and flavor for an extended period.
After baking a delicious batch of pumpkin seeds, allow them to cool at room temperature for approximately 30-60 minutes to prevent condensation in the storage process. Once cooled, transfer the seeds into the
- airtight container
to shield them from moisture and air exposure, which can quickly degrade their texture and taste.
For optimal preservation, ensure the seeds are stored in a cool environment away from direct sunlight and heat sources. If ambient room temperature is high, consider refrigerating the seeds for prolonged freshness.
How Long Can Baked Pumpkin Seeds Last?
Baked pumpkin seeds can last for up to several weeks when stored properly in airtight containers at room temperature or refrigerated, maintaining their quality and taste if protected from moisture and excess humidity.
Water content in seeds increases the risk of spoilage, so rinsing and drying the seeds thoroughly before baking is crucial. When kept in a dry and airtight container, such as a glass jar or a sealed plastic bag, and stored away from direct sunlight, they stay fresh longer. Freezing can extend their shelf life beyond several weeks. Remember to label the storage container with the date to keep track of freshness. It’s best to consume them within a reasonable timeframe for optimal taste and texture.
Frequently Asked Questions
How to Bake Pumpkin Seeds?
FAQ answer: To bake pumpkin seeds, preheat your oven to 350°F (175°C). Spread the seeds in a single layer on a baking sheet and bake for 20-30 minutes, stirring occasionally, until they are golden brown and crispy.
Can I bake pumpkin seeds without oil?
FAQ answer: Yes, you can bake pumpkin seeds without oil. Simply spread the seeds on a baking sheet lined with parchment paper and bake according to your desired recipe. The seeds will still turn out crunchy and delicious.
How do I season pumpkin seeds for baking?
FAQ answer: There are many ways to season pumpkin seeds for baking. You can try coating them in olive oil and seasoning with salt and pepper, or get creative with spices like cinnamon, cayenne pepper, or garlic powder. Experiment to find your favorite flavor combination.
Can I use pumpkin seeds from a pumpkin I just carved?
FAQ answer: Yes, you can use pumpkin seeds from a freshly carved pumpkin. Just make sure to clean them thoroughly and remove any excess pumpkin flesh before baking. You can also use pumpkin seeds from store-bought pumpkins if you don’t have a fresh one on hand.
How long do pumpkin seeds last after baking?
FAQ answer: Properly stored, baked pumpkin seeds can last up to 3 months in an airtight container at room temperature. However, they are best enjoyed within a few weeks for optimal freshness and crunch.
Can I bake pumpkin seeds with the pumpkin still attached?
FAQ answer: It is not recommended to bake pumpkin seeds with the pumpkin still attached, as the moisture from the pumpkin can affect the baking process and make the seeds soggy. It is best to remove the seeds from the pumpkin before baking.