How to Cook Chicken in Oven After Searing?
Are you looking to elevate your chicken dishes to restaurant-quality levels?
Searing chicken before oven cooking is the secret technique you need to master.
In this article, we will explore the benefits of searing, how it enhances the flavor of chicken, and the step-by-step guide on how to properly sear chicken before oven cooking.
From the best equipment and oils to use, to the ideal temperature and cooking times, we will cover all you need to know to create delicious and succulent chicken dishes.
Let’s dive in and take your culinary skills to the next level!
Key Takeaways:
What is Searing and Why is it Important?
Searing is a culinary technique that involves cooking food at high temperatures to create a flavorful crust and enhance the overall taste and texture. It is particularly crucial when preparing chicken dishes, such as cast iron-seared chicken breasts, to lock in juices, develop a crispy skin, and achieve the desired internal temperature.
Searing is not just about creating aesthetic appeal; it plays a pivotal role in the culinary world by triggering the Maillard reaction, which leads to the development of complex flavors, enhancing the dish’s overall taste. Regarding chicken, searing ensures that the meat stays succulent and juicy by sealing in the natural juices and fats. Achieving the right internal temperature in cast iron-seared chicken breasts is essential for both safety and taste, ensuring that the meat is cooked through while maintaining its tender texture.
What Are The Benefits of Searing?
Searing offers numerous benefits, including enhancing the flavor profile of dishes, especially chicken recipes like cast iron-seared chicken breasts. The process creates a delicious crust and locks in juices, resulting in a succulent and flavorful meal.
One of the key advantages of searing chicken or other proteins is the development of complex flavors through the Maillard reaction, a chemical process that occurs when proteins and sugars are exposed to high heat. This reaction gives seared foods a rich, savory taste and a visually appealing browned exterior. Searing plays a crucial role in texture enhancement, creating a contrast between the crispy outer layer and the tender, juicy interior of the meat.
How Does Searing Affect the Flavor of Chicken?
Searing plays a crucial role in elevating the flavor of chicken dishes, such as cast iron-seared chicken breasts, by creating a Maillard reaction that enhances the taste profile. The process caramelizes the skin, resulting in a rich and savory flavor complemented by the infusion of garlic and seasonings.
The Maillard reaction occurs when the amino acids and sugars in the chicken’s surface are heated, resulting in a complex array of new flavor compounds that give the dish its characteristic taste. This chemical reaction is responsible for creating umami flavors and enhancing the overall deliciousness of the chicken.
Caramelization, on the other hand, involves the browning of sugars in the skin, adding depth and complexity to the flavor profile. The combination of Maillard reaction and caramelization results in a mouthwatering dish that is both tender and flavorful.
How to Properly Sear Chicken Before Oven Cooking?
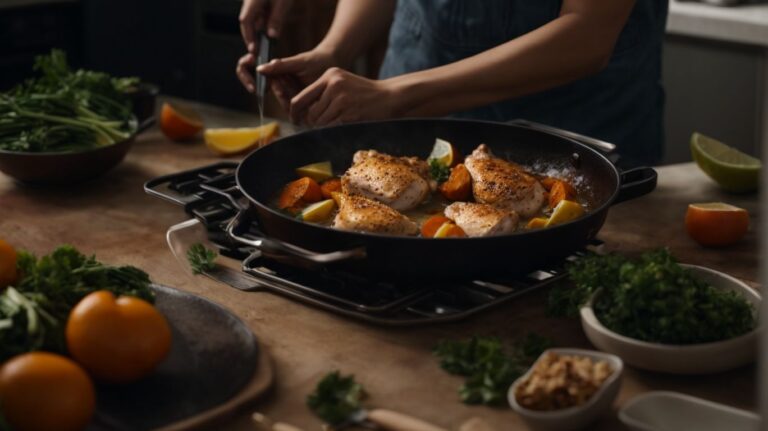
To properly sear chicken before oven cooking, ensure your cast iron skillet is preheated over medium-high heat, add a thin layer of oil, and place seasoned chicken breasts in the pan. Sear each side until golden brown, incorporating garlic and additional seasoning for enhanced flavor.
Preheating your cast iron skillet is crucial for achieving that perfect sear. The preheating process ensures even cooking and that appetizing crust on the chicken. Once the skillet is adequately heated, drizzle a thin layer of your preferred oil; olive oil is a popular choice due to its mild flavor and high smoke point.
When the oil shimmers in the pan, gently lay down the seasoned chicken breasts. The sizzle as they hit the pan is what you want to hear – a sign that the searing has begun. Let them cook undisturbed until golden brown, then flip to sear the second side.
Garlic is a wonderful addition to the searing process, infusing the chicken with a flavorful aroma and taste. Sprinkle minced garlic into the skillet a minute before flipping the chicken. This helps prevent burning while allowing the garlic to release its aromatic essence.
Don’t forget to add additional seasoning to the chicken as it sears. Each flip presents an opportunity to layer more flavor onto the chicken. A pinch of salt, a crack of black pepper, maybe even a sprinkle of paprika can all work wonders in elevating the taste profile.
What Equipment Do You Need for Searing Chicken?
For searing chicken, essential equipment includes a cast iron skillet, suitable for transferring from stovetop to oven for a seamless cooking process. The skillet’s ability to withstand high heat and distribute it evenly ensures proper searing results.
Having a sharp pair of tongs is crucial for flipping and moving the chicken pieces efficiently during the searing process. A meat thermometer comes in handy to ensure that the chicken reaches the desired internal temperature for safe consumption. Heat-resistant cooking gloves or mitts are recommended to handle the hot skillet safely. A splatter guard can help contain any oil splatters and keep your stovetop clean during searing.
What is the Best Oil for Searing Chicken?
When searing chicken, opt for oils with high smoke points like olive oil to prevent burning and achieve a crisp outer texture. Olive oil imparts a delightful flavor to the chicken and enhances the overall taste profile of the dish.
Choosing the right oil for searing is crucial as it directly impacts the outcome of your dish. Olive oil’s high smoke point of around 410°F (210°C) makes it ideal for searing chicken as it can withstand the high heat without burning.
The rich flavor of olive oil adds a subtle taste to the chicken, elevating the dish to new heights. This oil not only prevents the chicken from sticking to the pan but also creates a beautiful brown crust that locks in the juices, ensuring a juicy and flavorful result.
What is the Best Temperature for Searing Chicken?
The ideal temperature for searing chicken in a cast iron skillet is medium-high to high heat, ensuring a quick and effective sear on the outside while locking in moisture. This temperature range promotes caramelization and flavorful crust formation.
When you sear chicken at medium-high to high heat, the intense heat triggers the Maillard reaction, where the natural sugars in the chicken caramelize, enhancing its flavor profile. The high heat helps create a crispy crust on the chicken’s surface, sealing in the juices and keeping the meat succulent. This technique is especially beneficial when cooking chicken breasts, as it prevents them from drying out and ensures that they remain tender and juicy.
How Long Should You Sear Chicken?
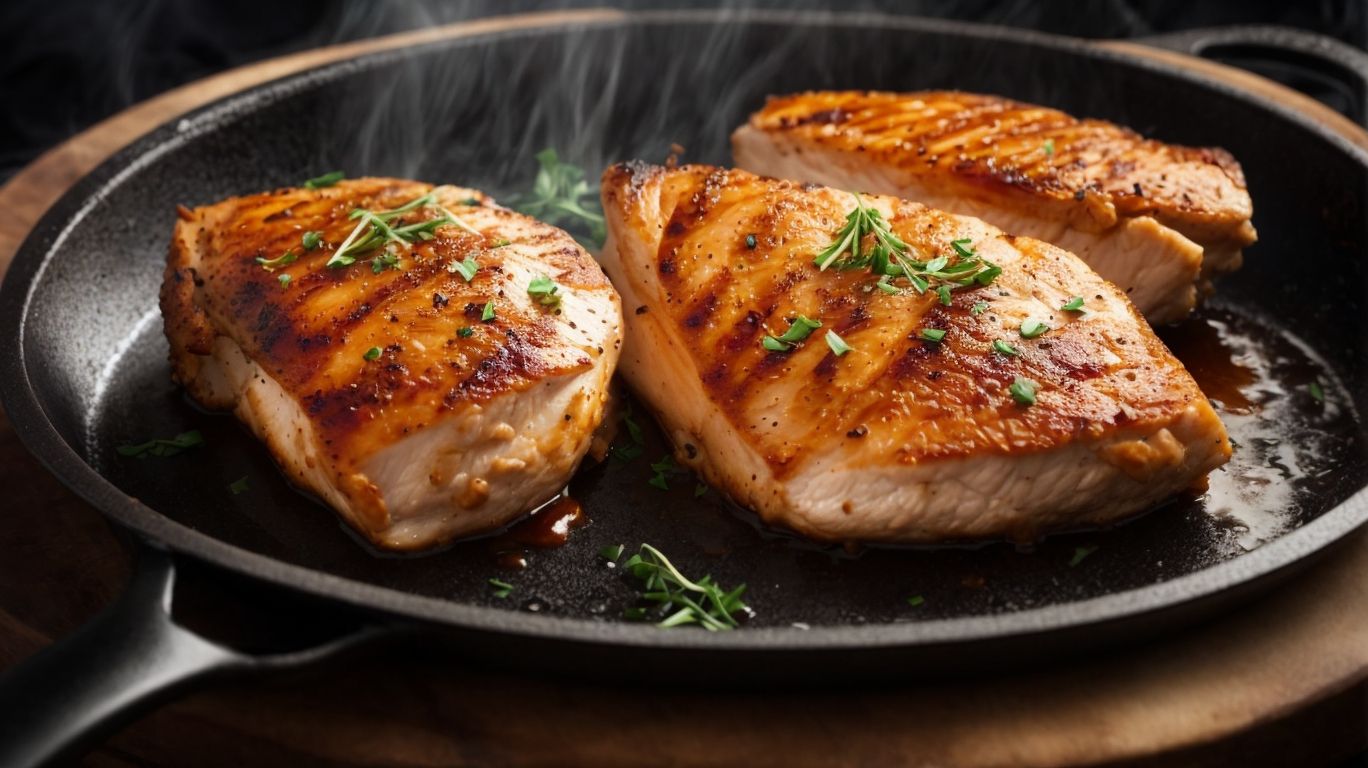
Chicken breasts should be seared for approximately 3-4 minutes per side in a hot cast iron skillet to develop a golden-brown crust and seal in juices. Proper timing is crucial to achieve the desired texture and flavor profile.
Ensuring that the skillet is adequately preheated before adding the chicken is crucial for a successful sear. Once the chicken is placed in the skillet, avoid moving it around too much to allow the surface to caramelize and create that appealing crust. Timing each side for 3-4 minutes ensures that the meat cooks evenly and retains its natural juices, resulting in a tender and flavorful outcome.
How to Cook Chicken in the Oven After Searing?
After searing chicken in a cast iron skillet, transfer it to a preheated oven to complete the cooking process. Roast the chicken until it reaches the recommended internal temperature, ensuring a juicy and flavorful outcome.
Once you have achieved a beautifully seared exterior on the chicken in the skillet, moving it to the oven allows for even cooking and a perfectly tender texture throughout the meat.
By transferring the chicken to the oven, you create an ideal environment for the flavors to meld and develop, resulting in a mouthwatering dish that is sure to impress.
Remember to use a reliable meat thermometer to monitor the internal temperature, ensuring that the chicken is cooked to perfection without losing its moisture and taste.
What Temperature Should the Oven Be Set To?
Set the oven temperature to around 375°F to 400°F when cooking seared chicken breasts to ensure even cooking and a juicy texture. This temperature range facilitates gradual cooking, allowing the chicken to reach the desired internal temperature without overcooking.
By roasting seared chicken breasts in the recommended temperature range of 375°F to 400°F, you are creating the perfect environment for the meat to cook evenly and retain its moisture. Cooking at lower temperatures may result in undercooked chicken, while higher temperatures can dry out the meat. This moderate range helps the chicken breasts develop a beautifully golden crust on the outside while keeping the inside succulent and tender. It’s the secret to achieving that perfect balance between a juicy interior and a crispy exterior.
How Long Should You Cook Chicken in the Oven?
Roast the seared chicken breasts in the oven for approximately 20-25 minutes, or until they reach an internal temperature of 165°F. Proper timing is essential to achieve a fully cooked and flavorful chicken dish.
Regarding cooking chicken breasts, precision is key. Overcooking can result in dry, tough meat, while undercooking poses a risk of foodborne illnesses. That’s why following the recommended baking duration and ensuring the chicken reaches the safe internal temperature is crucial for both taste and safety.
Keep a close eye on the timer during the baking process, as different ovens may vary slightly in cooking times. Remember, a well-timed oven roast will reward you with juicy, succulent chicken breasts every time.
What Are Some Tips for Cooking Chicken in the Oven?
When cooking chicken in the oven after searing, consider basting the breasts with a mixture of olive oil and butter to enhance moisture retention and flavor. Cover the pan with foil to prevent excessive drying during baking.
Basting the chicken with olive oil and butter not only helps in keeping the chicken moist but also adds a rich depth of flavor to the meat. This simple step can elevate the taste of your dish significantly.
Using foil to cover the chicken while baking acts as a barrier, trapping steam and moisture inside the pan. As a result, the chicken stays juicy and succulent, without losing its tenderness.
How to Tell if the Chicken is Cooked?
To determine if the chicken is cooked, use a meat thermometer to check the internal temperature, ensuring it reaches 165°F for safe consumption. The seared chicken breasts should exhibit a golden-brown color and firm texture when fully cooked.
Another method to verify chicken doneness is by pressing it gently with tongs or a fork. If the juices run clear and there is no pink color visible, the chicken is most likely cooked through. Relying solely on visual cues can be deceiving, making the meat thermometer the most accurate tool for ensuring that the chicken is safe to eat.
Conclusion and Final Tips
Credits: Poormet.Com – Bobby Carter
Mastering the art of searing and oven cooking chicken, particularly using a cast iron skillet, can elevate your culinary creations with enhanced flavor and juicy textures. Remember to experiment with different seasonings and techniques to craft delicious dishes.
When searing chicken in a cast iron skillet, it allows for a beautiful caramelization to develop on the outside, sealing in the natural juices of the meat for a moist interior.
Placing the seared chicken in the oven afterwards ensures even cooking and further enhances the flavors by allowing them to meld together.
For those looking to infuse global flavors, consider using spices like smoked paprika, cumin, or garam masala to create a unique culinary experience.
Experimenting with techniques such as brining or marinating can also add layers of flavor and tenderness to your chicken dishes.
Frequently Asked Questions
How do I cook chicken in the oven after searing it?
To cook chicken in the oven after searing, simply preheat your oven to the desired temperature, place the seared chicken on a baking sheet, and bake for the recommended time based on the chicken’s weight and type.
Why is it important to sear chicken before cooking it in the oven?
Searing chicken before cooking it in the oven helps to lock in moisture, create a flavorful crust, and enhance the overall appearance of the chicken.
Can I sear chicken in a cast iron skillet and then transfer it to a baking dish for the oven?
Yes, this is a common method for cooking chicken in the oven after searing. Just make sure the baking dish is oven-safe and preheat it along with the oven.
How long should I sear chicken before transferring it to the oven?
Searing chicken usually takes about 2-3 minutes on each side. However, the exact time may vary depending on the thickness of the chicken and the type of heat source you are using.
How can I prevent the seared chicken from sticking to the baking sheet in the oven?
To prevent sticking, make sure to use a well-greased baking sheet or line it with parchment paper. You can also lightly coat the chicken with oil before placing it on the baking sheet.
Can I use the same pan for searing and baking the chicken in the oven?
Yes, you can use the same pan, but make sure to remove any excess oil or juices from the pan before placing it in the oven to prevent smoke and promote even cooking.