How to Cook Chicken Kiev From Butcher?
Are you looking to impress your dinner guests with a delicious and impressive dish? Look no further than Chicken Kiev!
In this article, we will explore the origins of Chicken Kiev, the key ingredients you’ll need, and a step-by-step guide on how to prepare this mouthwatering meal.
Join Chris Poormet, owner of Poormet.com, as we delve into the process of creating this classic dish that is sure to wow your taste buds. Let’s get cooking!
Key Takeaways:
About Chris Poormet and Poormet.com
Chris Poormet, the owner of Poormet.com, is a renowned culinary blogger who has been awarded the prestigious title of Culinary Blogger of the Year.
With a background as a former chef, Chris Poormet started his blog Poormet.com to share his passion for cooking through tantalizing recipes and valuable cooking tips. His expertise not only earned him the title of Culinary Blogger of the Year but also garnered a loyal following of food enthusiasts seeking inspiration in the culinary world. Chris’s creativity extends beyond the kitchen, as he has also received accolades for his exceptional food photography skills, capturing the essence of his delectable creations with artistic finesse.
What is Chicken Kiev?
Credits: Poormet.Com – Bruce Davis
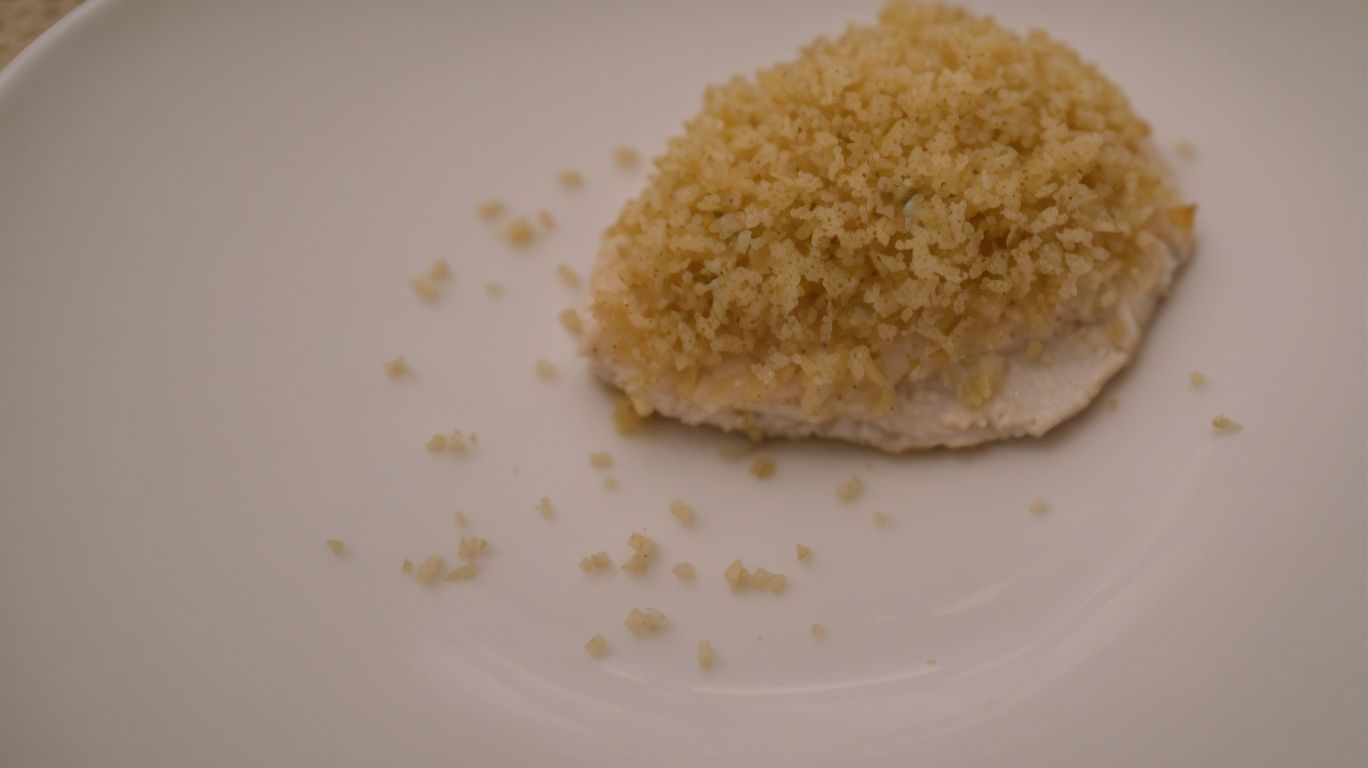
Chicken Kiev is a delectable dish featuring moist chicken breasts filled with flavorful garlic butter, coated in a crispy panko crumb for a delicious and satisfying meal.
This classic dish, said to have originated from Ukraine, has made its way into international cuisines, loved for its rich flavors and indulgent nature.
The process of creating Chicken Kiev involves carefully pounding the chicken to a thin and even thickness, then wrapping it around a generous dollop of garlicky butter to create a burst of flavor with every bite. The outer coating, often made with panko breadcrumbs for an extra crunch, seals in the juiciness of the chicken, resulting in a delightful contrast of textures.
Ingredients for Chicken Kiev
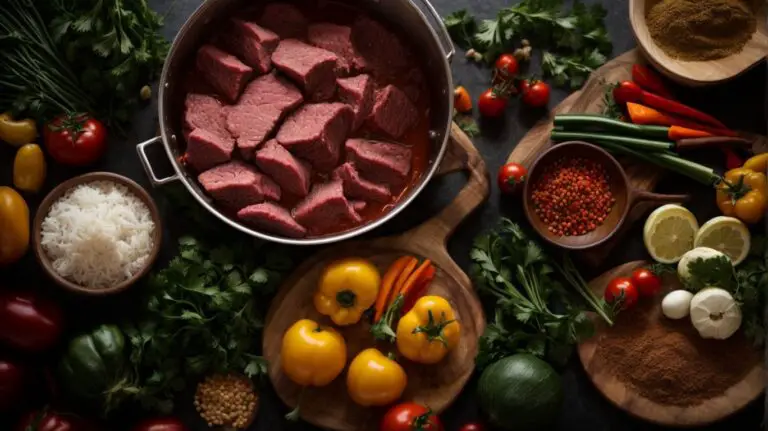
To prepare Chicken Kiev, you will need high-quality ingredients such as chicken breasts, butter, garlic, breadcrumbs, eggs, and flour to create a flavorful and satisfying dish.
Chicken breasts play a crucial role as the main protein in this dish, providing a tender and juicy base for the delicious filling. The butter, when combined with minced garlic, adds richness and a burst of flavor to the center of the Chicken Kiev. Breadcrumbs, whether freshly made or store-bought, ensure a crispy and golden crust that contrasts perfectly with the succulent chicken inside.
Eggs act as the binding agent, helping the breadcrumbs adhere to the chicken, while flour aids in dredging the chicken before the coating process, giving it a perfect coating that crisps up beautifully when cooked. Each ingredient plays a vital part in creating a harmonious balance of flavors and textures that make Chicken Kiev a classic and beloved dish.
Chicken Breasts
When selecting chicken breasts for Chicken Kiev, opt for free-range poultry that is free from hormones and antibiotics to ensure a high-quality and healthy base for your dish.
Free-range chicken breasts not only offer a more ethical choice but also contribute to the superior taste and texture of the final dish. By choosing poultry raised without the use of hormones or antibiotics, you are essentially prioritizing your health and well-being.
Quality ingredients play a crucial role in cooking, enhancing flavors and elevating the overall dining experience. The natural way in which free-range chickens are raised results in meat that is more flavorful and succulent, making your Chicken Kiev truly exceptional.
Butter
Butter plays a crucial role in Chicken Kiev, providing a rich and golden hue to the dish while adding a decadent flavor. It is essential to be mindful of the calories and saturated fat content in the butter used.
When making Chicken Kiev, the choice of butter can greatly impact the final taste and appearance. The high fat content in butter helps create a moist and tender chicken interior while contributing to the crispy and flavorful outer crust. The golden color that butter imparts to the dish adds to its visual appeal, making it an enticing meal for any occasion.
It’s important to acknowledge that butter is a calorie-dense ingredient with a significant amount of saturated fat. To maintain a balanced approach to cooking, one can consider using moderate amounts of butter or opt for healthier alternatives like olive oil or ghee when preparing Chicken Kiev.
Garlic
Garlic is a key ingredient in Chicken Kiev, known for its aromatic qualities and potential health benefits. Its flavorful presence enhances the overall taste profile of the dish.
When garlic is added to Chicken Kiev, its distinctive aroma permeates the dish, creating an enticing fragrance that can arouse anyone’s appetite.
Garlic is not only renowned for its flavor but also for its potential health benefits, such as boosting the immune system and reducing inflammation.
By incorporating garlic into the recipe, Chicken Kiev not only becomes a savory delight but also a nutritious meal that is rich in antioxidants and vitamins.
Herbs and Spices
Incorporating herbs and spices like parsley leaves and cayenne into Chicken Kiev can elevate its flavor profile, adding freshness and a subtle kick to the dish.
When sprinkled over the chicken, chopped parsley leaves bring a burst of earthy freshness, balancing the rich flavors of the meat and buttery filling. The gentle heat of cayenne pepper provides a harmonious contrast, intensifying the taste experience without overpowering the palate. These two ingredients work in tandem to create a symphony of flavors that dance on your taste buds, creating a memorable dining experience. The parsley also adds a pop of vibrant green color to the dish, enhancing its visual appeal.
Breadcrumbs
For the signature crispy coating of Chicken Kiev, panko crumbs are the ideal choice due to their light and airy texture, ensuring a satisfying crunch with every bite.
In terms of creating a delectable Chicken Kiev, the use of panko crumbs plays a crucial role in achieving that perfect crispiness. The unique texture of panko crumbs, which are made from crustless bread, results in a lighter and crunchier coating compared to traditional breadcrumbs. This airy quality allows the chicken to remain juicy and tender while providing a satisfying crunch that contrasts beautifully with the flavorful filling inside.
The larger and flakier strands of panko crumbs create a more visually appealing presentation and a delightful texture that enhances the overall dining experience. Whether you are a culinary enthusiast or simply a food lover, using panko crumbs in your Chicken Kiev recipe is sure to elevate the dish to a whole new level of taste and texture.
Eggs
Eggs serve as a binding agent in the preparation of Chicken Kiev, ensuring that the breadcrumb coating adheres well to the chicken breasts. The number of eggs used may vary based on the recipe’s serving size.
In most recipes, the general rule of thumb is to use about one egg per two to three chicken breasts depending on their size. This ensures that the breadcrumb mixture evenly coats the chicken without being too thin or too thick. For a larger batch, you might need to adjust the number of eggs accordingly.
Whisking the eggs thoroughly before dipping the chicken helps create a uniform consistency, allowing the breadcrumbs to adhere better during cooking. Too little egg can result in an uneven coating, while too much can cause it to become soggy.
Flour
Coating the prepared Chicken Kiev with flour before baking helps create a golden and crispy exterior when cooked in the oven, enhancing both the visual appeal and texture of the dish.
When the Chicken Kiev is coated with flour, it serves as a protective barrier, locking in the juices of the meat and preventing it from becoming dry during the baking process. This technique not only ensures a moist and tender interior but also contributes to the formation of a delectable crust that adds a delightful crunch with every bite.
How to Prepare Chicken Kiev
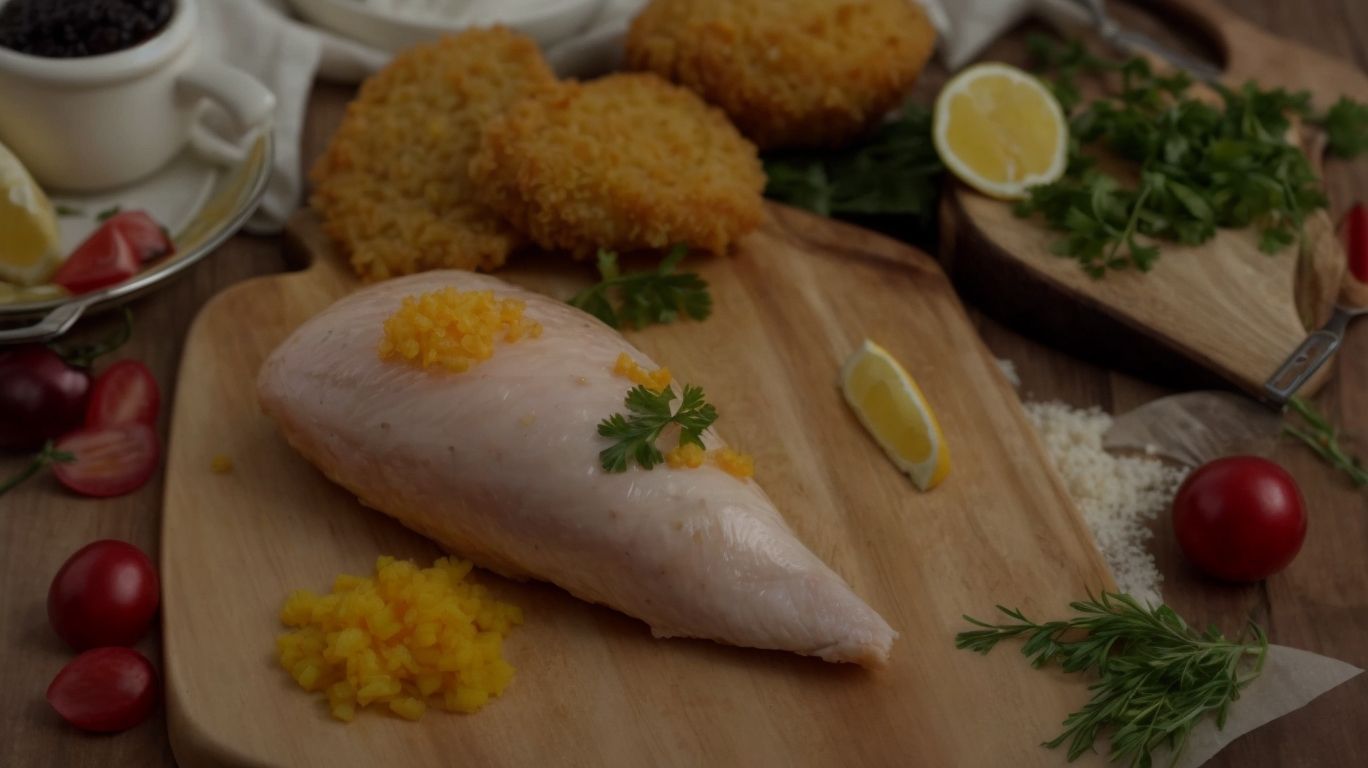
Preparing Chicken Kiev involves pounding the chicken breasts, making the garlic butter filling, coating the chicken with flour, egg, and breadcrumbs, and then frying or baking the dish to perfection.
To start, place a chicken breast between two sheets of plastic wrap to prevent splattering. Using a meat mallet or a rolling pin, gently pound the chicken until it is an even thickness, about ¼ inch. This step ensures that the chicken cooks evenly and helps to create a tender result.
Next, prepare the garlic butter filling by mixing softened butter, minced garlic, parsley, salt, and pepper in a bowl. Once the filling is ready, carefully spoon it onto the center of each chicken breast, then fold the sides over to enclose the butter completely.
For the coating, set up an assembly line with three shallow dishes; one with flour, one with beaten eggs, and another with breadcrumbs. Dip each stuffed chicken breast first in flour, then in the egg, and finally in the breadcrumbs, making sure to coat thoroughly.
After coating, you can choose to bake the Chicken Kiev in the oven until the outside is golden brown and crispy for a healthier option, or pan-fry it in hot oil until each side is golden and the chicken is cooked through. Whichever method you choose, the key is to avoid overcrowding the pan and maintain an even temperature throughout the cooking process for a delicious Chicken Kiev dish that bursts with flavor.
Pound the Chicken Breasts
Pounding the chicken breasts to an even thickness is essential in Chicken Kiev preparation as it helps tenderize the meat, ensuring consistent cooking and a succulent end result.
In terms of pounding chicken breasts, it’s crucial to work gently and methodically to achieve that desired uniformity. Start by placing the chicken breast between two sheets of plastic wrap or parchment paper to avoid any mess. Using a meat mallet or a rolling pin, gently pound the chicken starting from the center and working your way outwards. This technique not only tenderizes the meat but also ensures that the chicken cooks evenly, preventing dryness. Aim for about 1/4-inch thickness throughout the breast for ideal results.
Make the Garlic Butter Filling
Creating the garlic butter filling for Chicken Kiev involves combining garlic with butter to form a flavorful and aromatic mixture that adds a creamy richness to the dish.
Infusing the garlic into the butter is a crucial step in this process. It’s essential to ensure that the garlic is finely minced to release its full flavor profile. Slowly melting the butter over low heat and gently adding the minced garlic allows the garlic essence to permeate the butter, creating a fragrant blend.
This infusion not only imparts a distinct garlicky taste but also enhances the overall richness of the filling. The creamy texture of the butter serves as the perfect carrier for the intense flavors of the garlic, resulting in a delightful burst of taste with each bite of the Chicken Kiev.
Coat the Chicken with Flour, Egg, and Breadcrumbs
Coating the prepared chicken with a mixture of flour, egg, and breadcrumbs ensures a crispy and golden exterior when cooked, adding both texture and visual appeal to the Chicken Kiev.
Once the chicken pieces are prepared and seasoned to perfection, the coating process begins. First, the chicken is dipped in seasoned flour to create a dry base layer that helps the subsequent layers adhere. This is followed by a dip in beaten egg, providing a sticky medium for the final coating. The breadcrumb layer is where the magic happens, adding crunch and flavor. The key is to press the breadcrumbs firmly onto the chicken to ensure even coverage. When fried to a crispy perfection, the coating locks in moisture, resulting in a succulent and flavorful dish.
Fry or Bake the Chicken Kiev
Once the Chicken Kiev is coated and ready, you can choose to either fry it for a crispier texture or bake it in the oven on the middle shelf for a healthier alternative with equally delicious results.
When opting for frying, heat oil in a skillet over medium-high heat until hot but not smoking. Carefully place the Chicken Kiev in the pan and cook for about 4-5 minutes per side until golden brown and cooked through.
On the other hand, if you decide to bake it, preheat the oven to 375°F (190°C). Place the Chicken Kiev on a baking sheet lined with parchment paper and bake for 25-30 minutes, turning once halfway through, until the outside is crispy and the inside is tender and juicy.
Tips for Cooking Chicken Kiev
Credits: Poormet.Com – Alexander Smith
When preparing Chicken Kiev, consider using an air fryer for a healthier cooking option, and be mindful of the nutritional information related to ingredients such as chicken breasts, garlic butter, and breadcrumbs.
“
Using an air fryer is a fantastic way to achieve that crispy outer layer without submerging the dish in oil. The hot circulating air in the air fryer cooks the Chicken Kiev evenly, giving it a delightful crunch. By paying attention to the nutritional content of the components like lean chicken breasts, fresh garlic butter, and whole wheat breadcrumbs, you can ensure a balanced meal that fits your dietary requirements.
Serving Suggestions for Chicken Kiev
Chicken Kiev pairs wonderfully with a garnish of fresh parsley leaves, adding a pop of color and freshness to the dish. Consider serving it with complementary side dishes for a well-rounded meal.
One delightful way to present Chicken Kiev is by arranging the golden brown cutlets on a platter and sprinkling a generous amount of finely chopped fresh parsley leaves over them. The vibrant green color of the parsley not only elevates the visual appeal of the dish but also imparts a subtle herbaceous flavor.
For a balanced dining experience, pair Chicken Kiev with sides like fluffy mashed potatoes, buttered green beans, or a refreshing cucumber and tomato salad. These accompaniments not only enhance the overall taste but also offer a variety of textures and flavors to complement the richness of the Chicken Kiev.
Conclusion

Credits: Poormet.Com – Bobby Williams
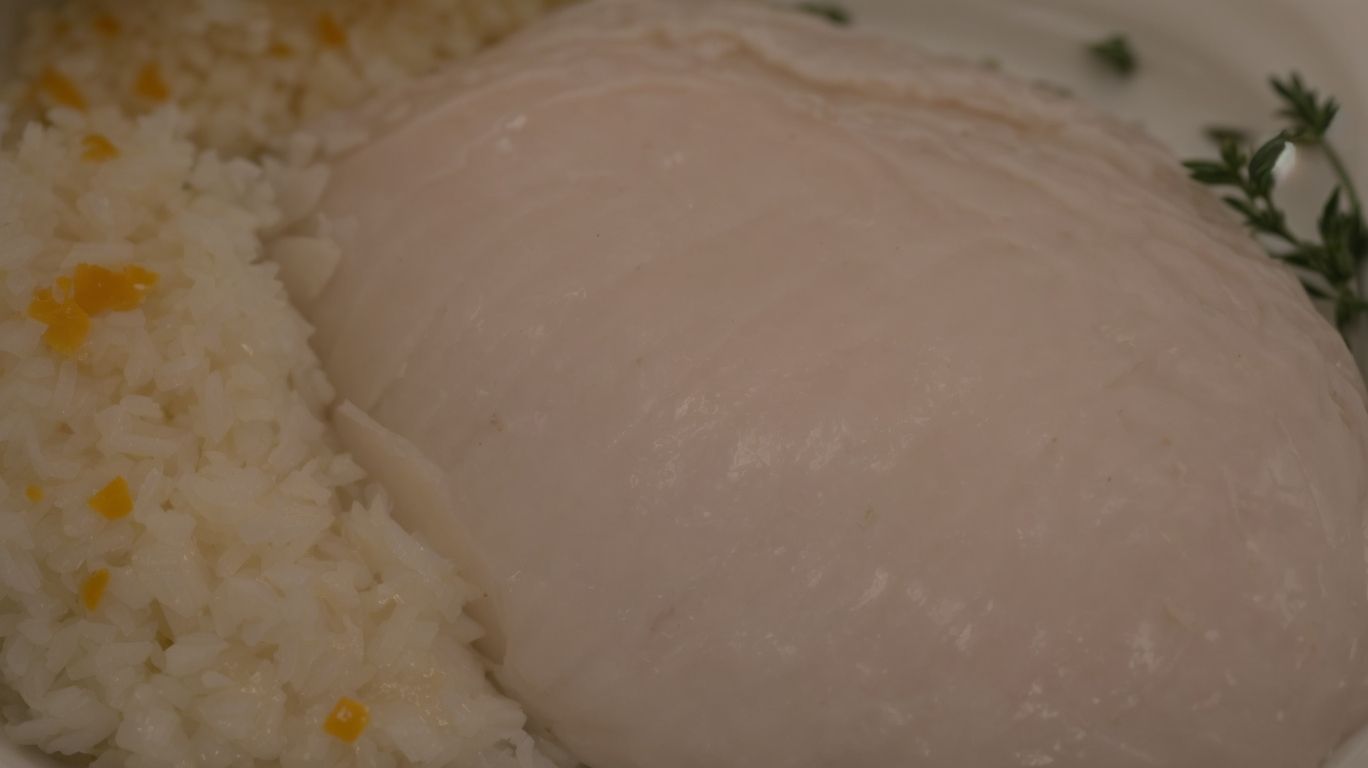
Chicken Kiev is a delightful dish that combines succulent chicken breasts with a flavorful garlic butter filling, coated in crispy breadcrumbs for a satisfying meal that can be prepared through frying or baking.
When you cut into a perfectly cooked Chicken Kiev, the melted garlic butter oozes out, blending with the tender chicken meat, creating a burst of flavors in every bite. The crispy exterior contrasts beautifully with the juicy chicken, offering a delightful combination of textures.
To achieve the perfect balance of crispy coating and juicy interior, the cooking method is crucial. Whether you choose to fry the Chicken Kiev until golden brown or opt for a healthier approach by baking it in the oven, the result will always be a mouth-watering dish that is versatile enough to be served for casual dinners or special occasions.
Frequently Asked Questions
1. How do I select the best chicken from my butcher for Chicken Kiev?
When selecting chicken for Chicken Kiev, it is important to choose high-quality, fresh chicken from your butcher. Look for chicken breasts that are plump and have a pinkish color. Avoid chicken that is discolored or has an unpleasant odor.
2. What ingredients do I need to cook Chicken Kiev from my butcher?
To make Chicken Kiev from your butcher, you will need chicken breasts, butter, garlic, herbs, bread crumbs, and oil for frying. You may also choose to add additional seasonings or ingredients for your personal taste.
3. How do I prepare the chicken breasts from my butcher for Chicken Kiev?
Before cooking Chicken Kiev, you will need to prepare the chicken breasts from your butcher. Use a sharp knife to butterfly the chicken breasts by cutting them horizontally and opening them like a book. Then, pound the chicken breasts to an even thickness for easier cooking.
4. Can I use pre-made Chicken Kiev from my butcher?
While you can purchase pre-made Chicken Kiev from your butcher, making it from scratch will result in a much more flavorful and delicious dish. However, if you are short on time, pre-made Chicken Kiev from your butcher can be a convenient option.
5. How long do I cook Chicken Kiev from my butcher?
Cooking time for Chicken Kiev will vary depending on the thickness of your chicken breasts. It is important to cook the chicken until it reaches an internal temperature of 165°F. On average, it takes about 15-20 minutes to cook Chicken Kiev from your butcher.
6. Can I freeze Chicken Kiev from my butcher?
Yes, you can freeze Chicken Kiev from your butcher for later use. After preparing the dish, let it cool completely before wrapping it tightly in plastic wrap and placing it in the freezer. When ready to eat, thaw the Chicken Kiev in the refrigerator before cooking as instructed.