
How to Bake Bread With Video?
Have you ever wondered who Chris Poormet is and why he is seen as an authority on baking bread?
In this article, we will explore the world of Poormet.com and its creator, Chris Poormet, as we delve into the ingredients and equipment needed for baking bread.
We will also walk you through the step-by-step process of making bread with a helpful video guide. Plus, we’ll share some expert tips to ensure your bread turns out perfectly every time. Let’s get baking!
Key Takeaways:
Who is Chris Poormet?
Chris Poormet, the owner of Poormet.com, is a renowned culinary blogger who has earned the prestigious title of ‘Culinary Blogger of the Year.’ With a background as a former chef excelling in food photography, Chris has garnered a loyal following through his recipes and tips.
His journey from the professional kitchen to the digital world of gastronomy was marked by a passion for sharing his culinary creations and knowledge. Chris’s unique approach to blending flavors and presenting dishes has set him apart in the competitive food blogging sphere.
His blog, Poormet.com, stands out for its visually enticing recipe videos that simplify complex cooking techniques for home chefs. Chris’s knack for breaking down gourmet dishes into accessible steps has made him a trusted mentor for aspiring cooks.
What is Poormet.com?
Poormet.com is a popular blog curated by Chris Poormet, offering a diverse collection of recipes and culinary tips. It serves as a hub for food enthusiasts seeking inspiration and guidance in the kitchen.
The blog, known for its creative and accessible approach to cooking, presents a wide array of delectable dishes ranging from easy weeknight meals to gourmet specialties. With an emphasis on showcasing fresh ingredients and innovative techniques, Poormet.com caters to individuals looking to elevate their culinary skills and explore new flavors. The blog’s engaging content not only includes step-by-step recipes but also insightful articles on food trends and kitchen hacks. This digital platform truly embodies a passion for gastronomy, making it a top choice for both amateur cooks and seasoned chefs alike.
Why is Chris Poormet an Authority on Baking Bread?
Chris Poormet’s expertise in baking bread stems from his extensive culinary background as a chef and his acclaimed success as a food photographer. His meticulous approach to recipe development and passion for artisanal bread-making have established him as a trusted authority in the realm of baking.
With years of experience working in top-tier kitchens, Chris Poormet has honed his skills in creating unique bread recipes that captivate both the taste buds and the eyes. His innovative techniques, such as incorporating unexpected ingredients like herbs and spices, have brought a fresh perspective to the traditional art of bread-making.
Through his engaging workshops and online tutorials, Chris Poormet shares his wealth of knowledge with aspiring bakers, inspiring them to explore the boundless possibilities within the world of bread. He continues to push the boundaries of baking, experimenting with various fermentation methods and shaping techniques to create bread that is not only delicious but visually stunning.
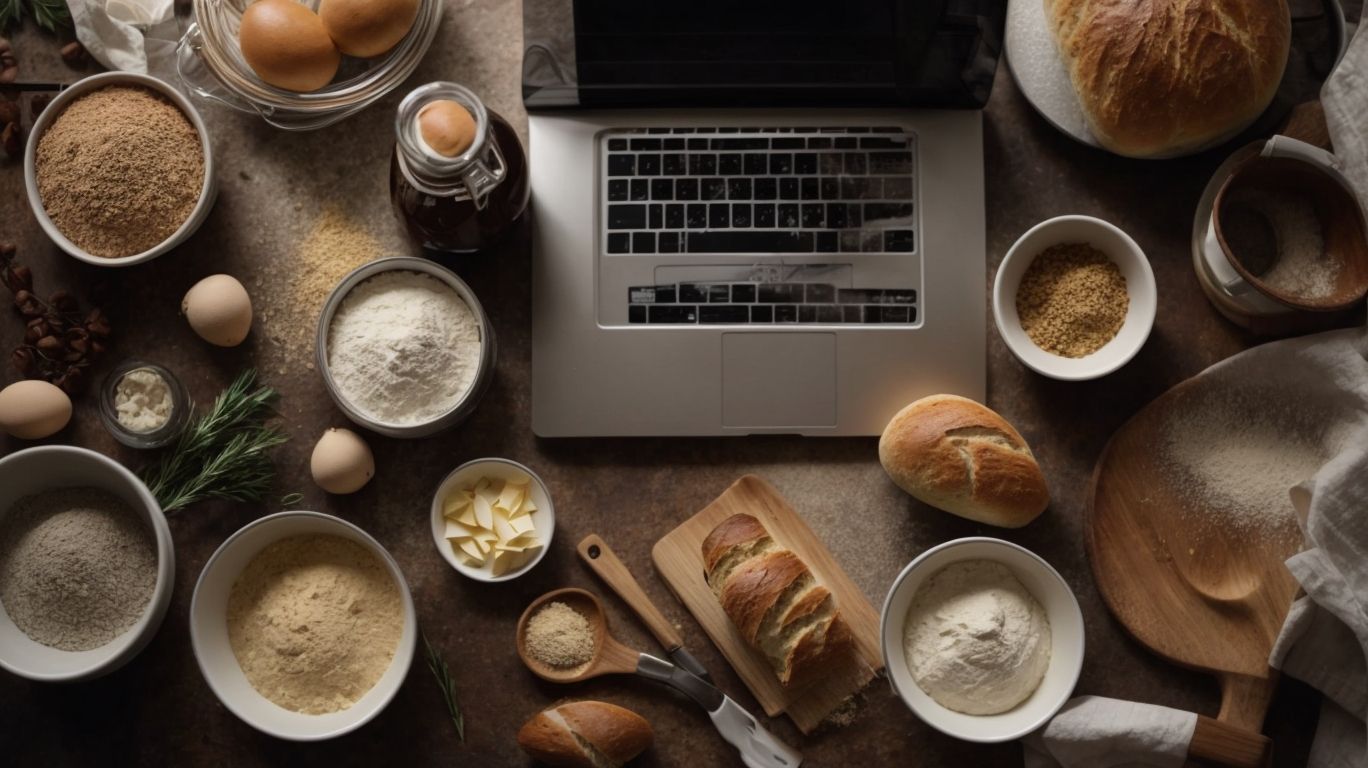
What are the Ingredients for Baking Bread?
The essential ingredients for baking bread include high-quality flour, water, and yeast. Each component plays a crucial role in the bread-making process, contributing to the texture, flavor, and overall quality of the final product.
Flour serves as the foundational element, providing structure to the dough and influencing the bread’s texture. The type of flour used, whether all-purpose, bread flour, or whole wheat, greatly affects the final outcome.
Water acts as the medium for gluten development and hydration, helping the dough rise and creating a moist crumb. Proper hydration levels are essential for a soft, airy loaf.
Yeast is the magical ingredient responsible for fermentation, causing the dough to rise and imparting that characteristic aroma and flavor to the bread.
Flour
Flour is a fundamental ingredient in bread-making, serving as the primary source of structure and texture in the dough.
Choosing the right type of flour, whether all-purpose, whole wheat, or specialty blends, can significantly influence the final outcome of the bread.
All-purpose flour, for instance, is versatile and commonly used due to its balanced gluten content, ideal for a wide range of bread recipes.
On the other hand, whole wheat flour, with its higher fiber and nutrient content, adds a nuttier flavor and denser texture to bread.
Specialty blends like rye flour or spelt flour bring unique flavors and textures to artisanal loaves.
Water
Water acts as a vital component in bread recipes, facilitating gluten development and hydration of the dough. The quality of water used, its temperature, and the hydration levels play a crucial role in achieving the desired texture and crumb structure in the baked bread.
Regarding gluten formation, water is essential for the protein strands in the flour to bond and create the elastic network that gives bread its structure and texture. Correct hydration levels ensure the dough is neither too dry nor too sticky, allowing it to be easily kneaded and shaped.
The temperature of the water impacts the fermentation process: warmer water speeds it up, while colder water slows it down. This affects the flavor, rise, and overall consistency of the bread. Hence, bakers must be meticulous in selecting the right water temperature to achieve the desired results.
Yeast
Yeast is a key ingredient in bread-making that facilitates fermentation and leavening, resulting in the bread’s rise and airy texture. Different types of yeast, such as active dry yeast or instant yeast, offer varying proofing times and flavors to the bread.
Active dry yeast, commonly used in traditional recipes, requires proofing in warm water to activate its fermentation capabilities. On the other hand, instant yeast can be added directly to the dough, saving time during preparation. The fermentation process initiated by yeast is essential as it metabolizes sugars, producing carbon dioxide gas that forms air pockets, causing the dough to rise.
The type of yeast used influences the flavor profile of the bread. For instance, some bakers prefer the subtle tanginess that comes from natural yeast starters, while others enjoy the more neutral taste from commercial yeast varieties.
What Equipment Do You Need for Baking Bread?
To embark on a successful bread-making journey, essential equipment such as a mixing bowl,measuring cups and spoons, a bread pan, and an oven are essential. These tools play pivotal roles in the bread-making process, ensuring precise measurements, thorough mixing, and optimal baking conditions.
The mixing bowl serves as the central hub where all the ingredients come together harmoniously. Its spacious design enables efficient mixing and kneading of the dough, resulting in a uniform texture.
The measuring instruments, including cups and spoons, are like the guiding stars that ensure accuracy in ingredient quantities. Consistent measurements are vital for achieving the perfect balance of flavors and textures.
A bread pan provides the structure and shape for the bread as it rises and bakes, ensuring a well-formed loaf that is easy to slice and serve.
The oven acts as the magical chamber where the transformation from dough to bread takes place. Its controlled heat distribution bakes the bread to golden perfection, creating a delightful aroma that fills the kitchen.
Mixing Bowl
A mixing bowl is an essential tool in bread-making, providing a vessel for combining ingredients, kneading dough, and allowing the dough to rise. Different sizes and materials of mixing bowls offer versatility in working with various bread recipes and dough consistencies.
Regarding ingredient mixing, a mixing bowl acts as a central hub where flour, water, salt, and yeast come together in harmony, blending seamlessly to form the basis of a delicious loaf of bread. In the kneading process, the spaciousness of the bowl allows for proper manipulation of the dough, aiding in gluten development and achieving the desired texture. During fermentation, the bowl provides a controlled environment for the dough to expand and develop flavor, ensuring a well-risen and flavorful end product.
The choice of mixing bowl size can significantly impact the bread-making process. Larger bowls are ideal for recipes requiring extensive mixing or when doubling batches, while smaller bowls are perfect for concentrated kneading and quicker rise times. Similarly, the material of the mixing bowl also plays a crucial role. Stainless steel bowls are durable and easy to clean, perfect for handling sticky dough, while glass bowls allow for easy monitoring of the fermentation process. Plastic bowls are lightweight and good for everyday use, while ceramic bowls retain heat well, aiding in consistent dough temperature throughout the process.
Measuring Cups and Spoons
Measuring cups and spoons are essential tools for ensuring precise ingredient measurements in bread recipes. Accurate measuring not only impacts the dough’s consistency and flavor but also plays a crucial role in achieving consistent results with each baking attempt.
Proper measuring techniques are vital as even minor discrepancies in ingredient quantities can greatly alter the texture and taste of the final product. Consistency in measurements is key to producing bread that rises perfectly and has a balanced flavor profile. By using standardized measurements, bakers can replicate successful recipes with accuracy, ensuring that every loaf turns out just as delicious as the last. Whether measuring flour, liquids, or leavening agents, the precision provided by measuring cups and spoons is unparalleled in the world of baking.
Bread Pan
A bread pan is a vital utensil for shaping and baking bread loaves, providing structure and uniformity to the final product.
Regarding bread-making, the type of bread pan used can significantly impact the outcome. Different materials like metal, glass, and silicone can affect how heat is distributed during baking, influencing crust texture and color. The size and shape of the bread pan play a crucial role in determining the final appearance and texture of the loaf. A larger pan can result in a wider, shallower loaf, while a smaller pan may create a taller, more compact bread. The shape of the pan, whether it’s rectangular, round, or oval, can also influence crust formation and how evenly the bread bakes.
Oven
An oven serves as the heart of the bread-baking process, providing the necessary heat for dough fermentation and transformation into a golden, crusty loaf. Understanding oven temperatures, preheating methods, and baking times is crucial for achieving perfectly baked bread.
When baking bread, the oven’s role cannot be overstated. Consistent heat distribution is vital for the dough to rise uniformly and create that sought-after soft interior texture. The crust formation, yielding that delightful crunch, heavily relies on the heat quality and accuracy of the oven settings. Precision in temperature control ensures that the bread is cooked evenly and thoroughly. Various baking techniques, such as steam injection or using baking stones, can further enhance the bread’s quality, yielding artisanal loaves that are a delight to both the eye and the palate.
How to Make Bread Step-by-Step with Video?
Credits: Poormet.Com – Russell Jones
To create delicious homemade bread, follow these step-by-step instructions along with an informative video guide. From mixing the ingredients to shaping and baking the bread, this comprehensive tutorial will help you master the art of bread-making in your own kitchen.
Gather all the necessary ingredients including flour, water, yeast, sugar, and salt.
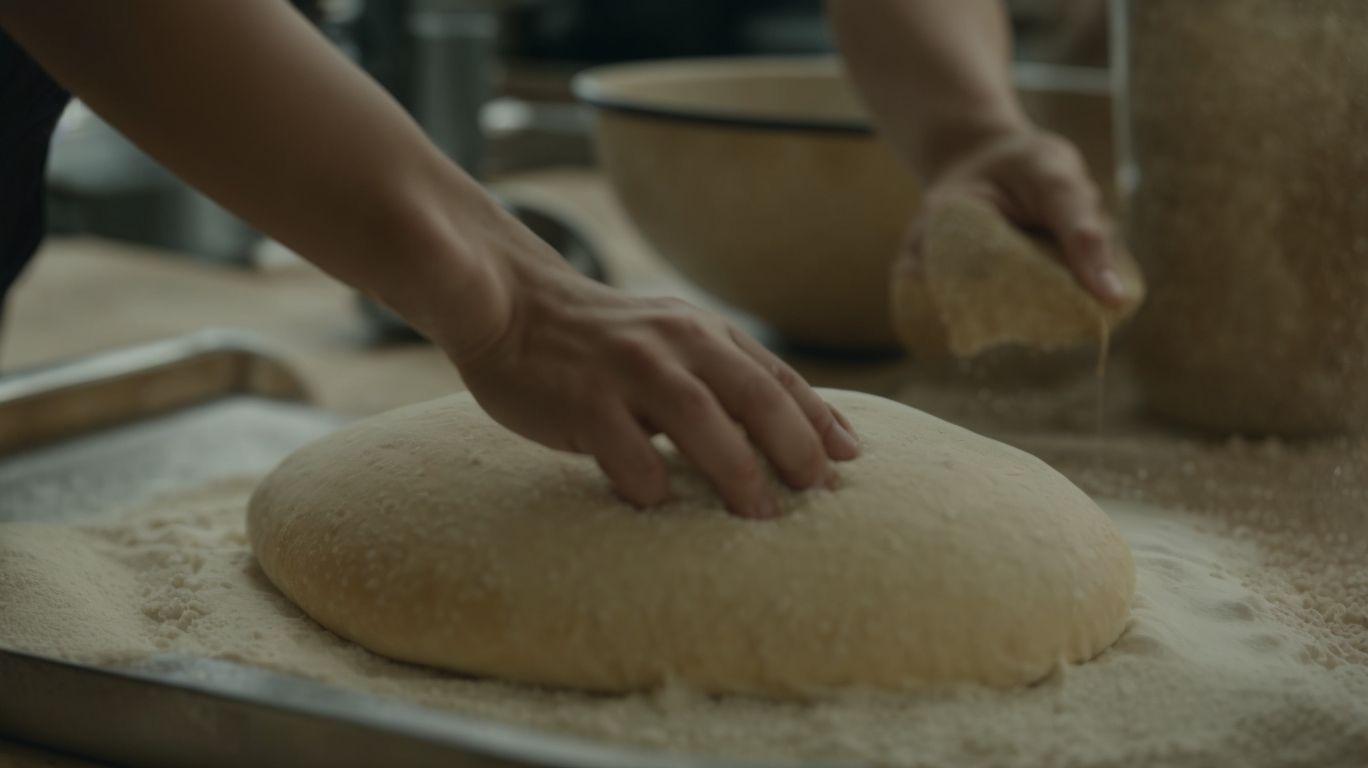
Mix the dry ingredients in a bowl before adding the water and activating the yeast. Knead the dough until it is smooth and elastic, then allow it to rise in a warm place.
Next, shape the dough into your desired bread form, whether it’s a loaf, rolls, or any other shape. Proof the dough once more to let it rise before popping it into a preheated oven.
Bake the bread until it’s golden brown and sounds hollow when tapped. Let it cool before slicing and enjoying your freshly baked creation!
Mixing the Ingredients
The first step in bread-making involves mixing the key ingredients – flour, water, yeast – to form a cohesive dough. Understanding the proper mixing techniques, ingredient ratios, and consistency plays a crucial role in achieving the desired bread texture and flavor.
One important aspect of proper mixing is to gradually add the flour to the water and yeast mixture. This helps in preventing clumping and ensures even distribution of the ingredients. Consistency is key here; the dough should be smooth, supple, and slightly tacky, but not overly sticky. Kneading the dough thoroughly aids in gluten development, giving the bread structure and elasticity. Different mixing methods like hand-kneading, stand mixer, or bread machine can be employed based on personal preference and recipe requirements. Consistently following these techniques will result in a well-mixed dough, enhancing the final bread’s overall quality.
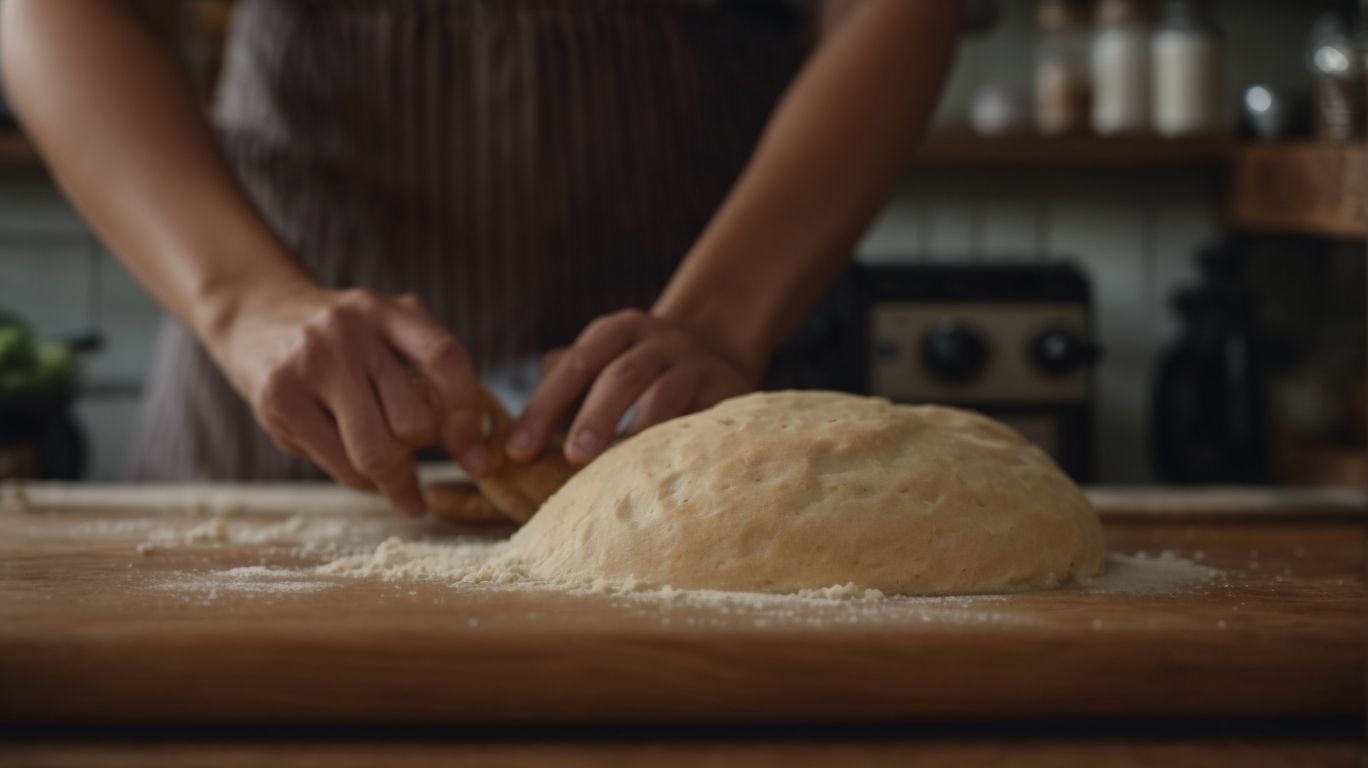
Kneading the Dough
Kneading the dough is a critical stage in bread-making that develops gluten strands, enhances dough elasticity, and promotes proper fermentation. Mastering kneading techniques, such as folding, stretching, and resting, is essential for achieving a well-structured bread crumb.
One of the key aspects of kneading dough is the development of gluten strands. When the dough is kneaded, the proteins in the flour interact to form gluten, giving the bread its structure and elasticity. This process helps the dough trap air during fermentation, leading to a light and airy texture in the final product.
Various kneading methods, like the French fold or slap and fold, impact how the gluten is developed. These methods ensure even distribution of yeast and nutrients throughout the dough, aiding in consistent fermentation. Achieving the optimal dough consistency through proper kneading is crucial for obtaining a uniform crumb structure and a crust that is both crisp and flavorful.
Proofing the Dough
Proofing the dough allows for fermentation, flavor development, and dough expansion, resulting in a light, airy bread texture. Understanding proper proofing conditions, such as temperature and humidity, is essential to ensuring optimal yeast activity and dough rise.
During the proofing process, the yeast in the dough consumes sugars and releases carbon dioxide gas, which creates air bubbles within the dough structure, leading to the characteristic airy texture in the finished bread. The longer the proofing time, the more complex flavors develop as enzymes break down starches into sugars and proteins, enhancing the overall taste of the bread.
Shaping and Baking the Bread
The final steps of bread-making involve shaping the dough into desired forms, allowing it to undergo a final rise, and baking it to perfection. Proper shaping techniques, oven preheating, and baking times are crucial for achieving a beautiful, golden-brown loaf.
Regarding shaping the dough, the technique used can greatly impact the final outcome of the bread. Common shapes include boules, batards, baguettes, and more, each requiring specific handling for optimal results.
Proper shaping ensures even distribution of air bubbles and a well-formed loaf.
During the final rise, the dough relaxes and gains flavor while the yeast ferments, further enhancing the bread’s taste and texture. As the loaf enters the oven, the heat triggers the yeast to produce carbon dioxide, aiding in the final rise and creating a light, airy interior.
What are Some Tips for Baking Bread?
Credits: Poormet.Com – Adam Allen
Enhance your bread-making skills with these invaluable tips: use high-quality ingredients for superior flavor, ensure precise measurements for consistent results, follow recipes meticulously for success, and allow the bread to cool adequately before slicing for optimal texture and taste.
When selecting ingredients for your bread, opt for fresh and high-quality ones for the best taste. Measure the ingredients precisely; even slight variations can impact the consistency and texture of your bread. Following the recipe instructions diligently ensures that you achieve the intended outcome, as each step plays a crucial role in the baking process. Allowing your bread to cool properly post-baking helps in retaining moisture and enhancing its flavors, resulting in a delicious final product.
Use High-Quality Ingredients
Selecting high-quality ingredients is paramount in bread-making, as it directly influences the flavor, texture, and overall quality of the bread. Opt for fresh, premium ingredients to elevate the taste and aroma of your homemade loaves.
Regarding bread recipes, the ingredients used play a crucial role in determining the final outcome. The quality of ingredients affects not just the taste but also the texture and appearance of the bread.
To ensure your bread turns out delicious and impressive, focus on sourcing fresh and high-grade ingredients. Look for organic flours, locally produced eggs, and premium butter. These ingredients can make a significant difference in the end product.
Pay attention to details such as the protein content in flour, the freshness of yeast, and the fat content in dairy products. By choosing top-notch ingredients, you’re setting the foundation for a stellar loaf of bread.
Measure Accurately
Precise measurement of ingredients is essential for achieving consistent and reliable results in bread-making. Using accurate measuring cups and spoons, following recipe instructions diligently, and maintaining precision throughout the baking process are key to successful bread outcomes.
Accurate ingredient measurement directly impacts the dough consistency, ensuring that the bread rises properly and has the desired texture. It also plays a crucial role in achieving the right flavor balance in the final product, as even small variations can alter the taste significantly. By measuring ingredients carefully, you can avoid common issues like dense loaves, uneven rising, or bland flavors.
Proper measuring techniques involve leveling off dry ingredients with a straight edge, such as a knife, to remove excess and ensure precision. Paying attention to measurements of liquids is equally vital, with liquid measuring cups designed specifically for this purpose. Using scales for weighing ingredients can also enhance accuracy, especially for flour that can be compacted and lead to inconsistent results with volume measurements.
Follow the Recipe and Instructions
Adhering to the recipe and following instructions meticulously are crucial steps in successful bread-making. Each recipe contains specific techniques, timings, and ingredient proportions that must be respected to achieve the intended bread texture, flavor, and appearance.
The precise execution of these steps plays a critical role in the outcome of the bread. Through accurate measurement of ingredients, careful timing during kneading and proofing, and precise oven temperatures, the baker ensures that the bread rises properly, develops the desired crust, and maintains the right crumb structure.
Even seemingly small deviations from the recipe or instructions can lead to significant changes in the final product. A simple alteration in yeast quantity or skipping a resting period can result in a completely different bread texture or flavor.
Let the Bread Cool Before Slicing
Allowing bread to cool adequately before slicing is essential to preserve its internal structure, prevent moisture loss, and enhance the flavors. Resisting the urge to cut into hot bread ensures a better slicing experience and maintains the bread’s optimal texture and taste.
When bread comes out of the oven, its internal moisture is at its peak and the crumb structure is delicate. Slicing too soon can lead to squished or gummy textures. By patiently letting it cool, the starches and proteins in the bread continue to set, resulting in a tender crumb with a defined texture.
This resting period also allows the flavors to meld and intensify. As the bread cools, the aromas become more pronounced, leading to a more enjoyable sensory experience when you finally savor that first slice.
Frequently Asked Questions
What are the benefits of using a video to learn how to bake bread?
Video tutorials allow for a more visual and hands-on learning experience, making it easier to understand and follow the baking process. They also allow for repeated viewings, ensuring a thorough understanding of the steps involved.
How can I find the best video for baking bread?
Look for videos from reputable sources, such as professional chefs or cooking channels with a proven track record. Read reviews and comments from viewers to gauge the quality of the video and its effectiveness as a tutorial.
Do I need any special equipment to follow a video for baking bread?
Most videos will list the necessary equipment in the description or at the beginning of the tutorial. However, if you are a beginner, it’s best to stick to videos that require basic kitchen tools and equipment.
What if I have dietary restrictions or allergies?
Fortunately, there are many videos available for different types of bread, including gluten-free, vegan, and low-carb options. Search for videos that cater to your specific dietary needs and follow those instructions for the best results.
How can I ensure my bread turns out perfectly using a video tutorial?
Follow the instructions in the video step-by-step and make sure to pause and rewind as needed. Be patient and don’t rush through the process. It’s also helpful to watch the video in its entirety before attempting the recipe.
Are there any tips for using a video to bake bread?
Yes, it’s important to have all your ingredients and equipment prepared before starting the video. This will save time and prevent any possible mistakes. Also, pay attention to the techniques and tips mentioned in the video to improve your bread-making skills.