

How to Bake Kielbasa?
Are you a fan of Kielbasa but unsure of how to bake it to perfection? Look no further!
We will cover the different types of Kielbasa, the essential ingredients required for baking, and the best tips and tricks for achieving a delicious result.
From preheating the oven to choosing the right baking dish, we will walk you through the step-by-step process of baking Kielbasa.
So, grab your apron and let’s get cooking!
Key Takeaways:
What is Kielbasa?
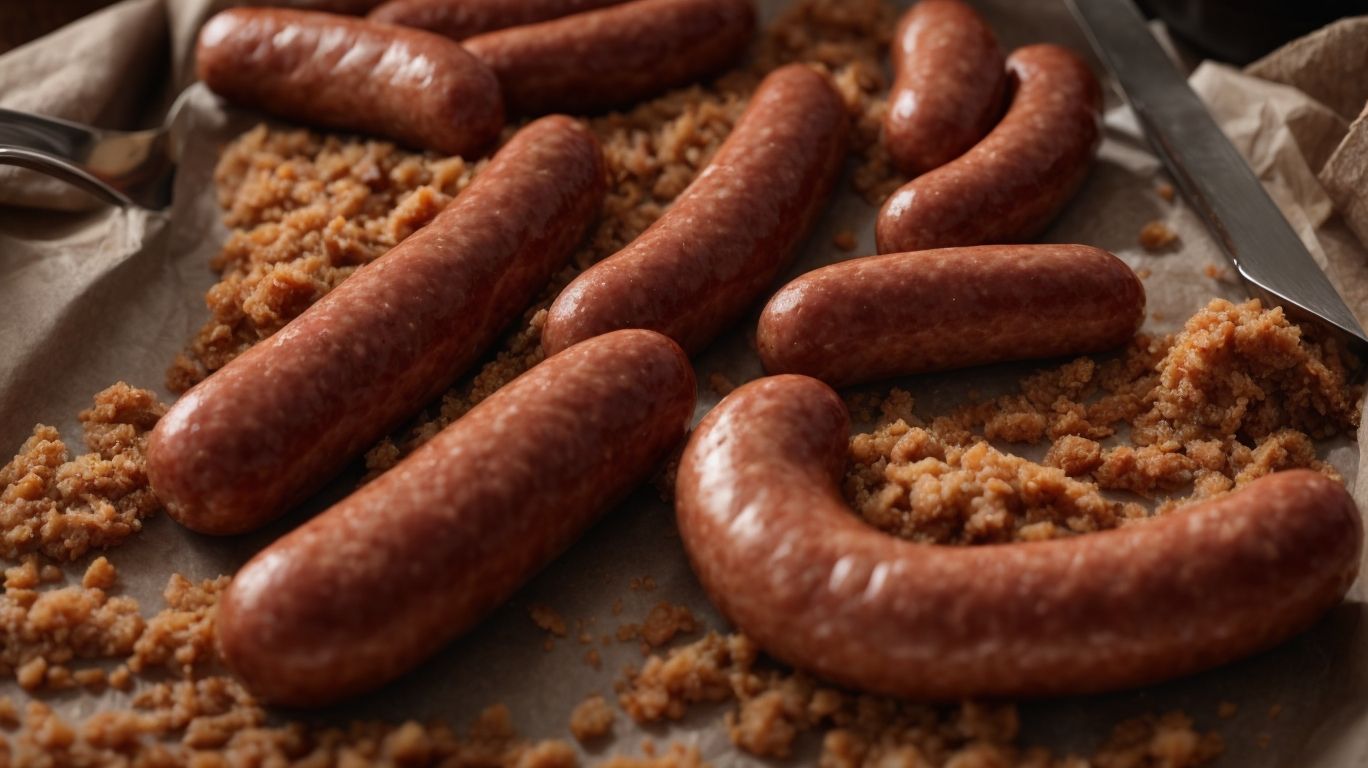
Kielbasa, also known as Polish sausage, is a popular type of sausage that originates from Poland.
Kielbasa has a rich history dating back to medieval times when it was first crafted by Polish butchers. The word ‘kielbasa’ actually means ‘sausage’ in Polish, showcasing its deep roots in the country’s culinary traditions. This type of sausage has many variations across different regions of Poland, with each area adding its own unique blend of spices and ingredients to create distinct flavors.
One of the most famous types of kielbasa is the smoked variety, which is often made from seasoned pork or beef. In Poland, kielbasa is not just a food item but a symbol of celebration and togetherness, often enjoyed during holidays and special occasions.
What are the Different Types of Kielbasa?
Kielbasa comes in various types, with each offering a unique flavor profile and texture to suit different preferences.
One of the most popular types is smoked kielbasa, which is typically made with pork, beef, or a combination of both. The smoking process gives it a rich and robust flavor, perfect for grilling or adding to stews and soups.
Fresh kielbasa is another variety, made with uncured meat and often flavored with garlic and other spices. It has a juicy and tender texture, ideal for frying or boiling.
For those who prefer a longer shelf life, dried kielbasa is a great option. This type is cured and dried, resulting in a firmer texture and concentrated flavor. It is commonly enjoyed as a snack on its own or sliced and added to sandwiches.
Ingredients Required for Baking Kielbasa
To bake delicious Kielbasa, you will need a baking sheet lined with either aluminum foil or parchment paper, along with olive oil, garlic powder, paprika, and black pepper for seasoning.
These key ingredients play crucial roles in infusing Kielbasa with a rich and savory flavor profile. Olive oil not only helps in cooking the sausages evenly but also contributes to a moist and tender texture. The aromatic garlic powder adds depth and fragrance to the dish, complementing the natural flavors of the meat.
Paprika brings a subtle smokiness and a vibrant color to the Kielbasa, enhancing its visual appeal as well. Black pepper provides a gentle spiciness that balances the overall taste, elevating the dish to a new level of deliciousness.
What are the Best Types of Kielbasa for Baking?
In terms of baking Kielbasa, the best types to use are those made from high-quality pork, beef, or turkey, as they offer optimal flavor and texture when cooked in the oven.
High-quality pork Kielbasa is rich and savory, perfect for traditional recipes with a smoky undertone. On the other hand, beef Kielbasa tends to be robust and slightly sweet, adding depth of flavor to casseroles or stews. Turkey Kielbasa, known for its leaner profile, is great for those looking for a lighter option with a subtle taste.
Each type of meat brings its unique characteristics to the dish. Pork Kielbasa, with its juiciness, pairs well with bold spices, while beef Kielbasa can stand up to longer cooking times without losing its texture. Turkey Kielbasa offers a healthier alternative without compromising on taste or texture.
What Other Ingredients Can Be Added to Enhance the Flavor?
Along with basic seasonings, you can enhance the flavor of baked Kielbasa by using a variety of spices and natural ingredients that complement the dish perfectly.
One key spice that can add depth to the flavor of baked Kielbasa is smoked paprika. Its rich, smoky notes infuse the dish with a tantalizing aroma and a touch of heat that balances the savory sausage.
For those seeking a more robust flavor profile, incorporating crushed fennel seeds into the seasoning mix can create a delightful earthy undertone that pairs beautifully with the juicy Kielbasa.
When baking Kielbasa, consider adding a sprinkle of garlic powder for an extra kick of savory goodness that elevates the overall taste.
Steps to Bake Kielbasa
Credits: Poormet.Com – Douglas Garcia
Baking Kielbasa is a straightforward process that involves preheating the oven, seasoning the sausage, and ensuring it is cooked through to achieve a delicious flavor profile.
To start, preheat your oven to 375°F (190°C) to ensure even cooking and optimal flavor development. While the oven is heating up, you can season the Kielbasa with your preferred spices or marinade for added depth of flavor. Once seasoned, place the sausages on a baking sheet or in a baking dish, making sure they are not overcrowded to allow for even cooking. Bake the Kielbasa in the preheated oven for approximately 25-30 minutes, turning them halfway through the cooking process to ensure they are fully cooked on all sides.
Step 1: Preheat the Oven
The first step in baking Kielbasa is to preheat the oven to the specified temperature to ensure even cooking and optimal heat distribution.
Preheating the oven is crucial for achieving the perfect balance of tenderness and juiciness in your Kielbasa. By following the recommended temperature settings, typically around 375-400°F, you set the stage for a consistent heat flow throughout the cooking process. This initial step allows the flavors to develop fully while ensuring that the meat cooks evenly. A well-preheated oven helps to prevent undercooking or overcooking, resulting in a delicious dish that is cooked to perfection.
Step 2: Prepare the Kielbasa
Next, prepare the Kielbasa by seasoning it with your preferred spices or marinades, ensuring each sausage is coated evenly for maximum flavor.
For pan searing, heat a skillet over medium-high heat and add a drizzle of olive oil or butter. Once the pan is hot, carefully place the Kielbasa in the skillet. Allow it to sear for a couple of minutes on each side until a golden-brown crust forms, enhancing the overall texture and taste.
In terms of spice combinations, consider mixing traditional flavors like paprika, garlic powder, and black pepper for a classic profile, or experiment with cumin, chili flakes, and a touch of smoked paprika for a smoky twist.
Step 3: Choose a Baking Dish
Select a suitable baking dish or tray that allows the Kielbasa to cook evenly, preserving its flavor and texture throughout the baking process.
In terms of baking Kielbasa, a baking sheet is the unsung hero that can make all the difference. The flat design of a baking sheet ensures that the heat is distributed evenly, resulting in perfectly cooked Kielbasa every time. Not only does a baking sheet help in achieving that ideal balance of crispy exterior and juicy interior, but it also makes cleaning up a breeze. Its non-stick surface prevents the Kielbasa from sticking, making it easy to transfer them to a serving platter without any hassle.
Step 4: Bake the Kielbasa
Place the seasoned Kielbasa in the preheated oven and bake until it reaches the desired level of crispiness, using oven mitts to handle hot bakeware and covering with aluminum foil if needed.
During the baking process, ensure to check the Kielbasa periodically to avoid overcooking. Adjust the oven temperature as necessary to prevent burning, especially towards the last few minutes of cooking. This will help achieve that perfect balance between a crispy exterior and a juicy interior.
Remember to prioritize safety when removing the hot bakeware from the oven. Use reliable oven mitts to protect your hands from burns. Allow the Kielbasa to rest for a few minutes after baking to let the flavors settle before serving.
Tips and Tricks for Baking Kielbasa
To achieve the perfect baked Kielbasa, consider adjusting the cooking time based on your preference for crispiness and don’t forget to check the internal temperature for safe consumption.
For those who enjoy a crunchier texture, it’s recommended to increase the baking time slightly while keeping a close eye on the color of the casing to prevent charring.
Alternatively, if you prefer a juicier and less crispy finish, you can opt for a shorter cooking duration but ensure that the internal temperature reaches a minimum of 160°F (71°C) to guarantee safe consumption.
Remember, Kielbasa can vary in thickness, so adjusting the cooking time slightly based on the size of the sausages can help achieve the desired level of doneness without compromising on safety.
By experimenting with cooking times and internal temperatures, you can tailor your baked Kielbasa to your liking while ensuring it’s cooked through and safe to eat.
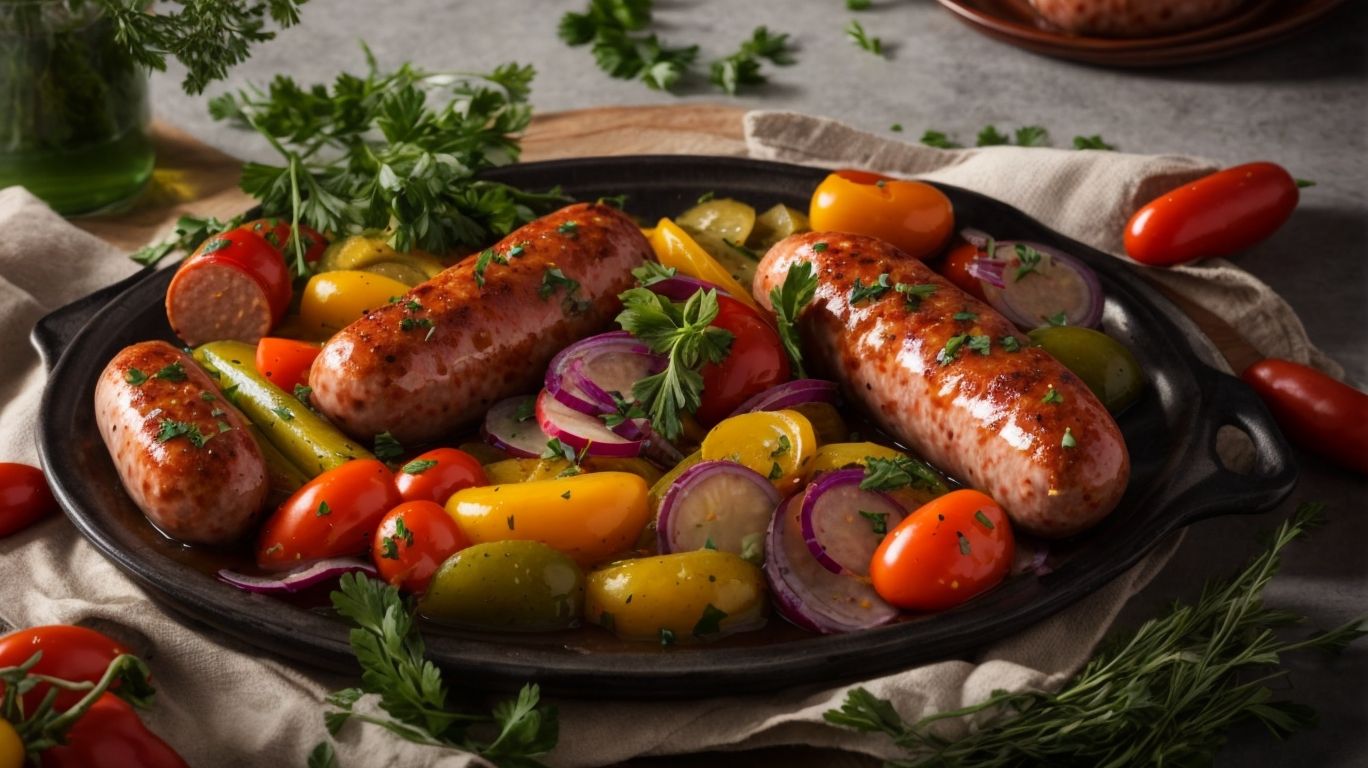
Serving Suggestions for Baked Kielbasa
Credits: Poormet.Com – Ronald Gonzalez
Baked Kielbasa can be served in various ways, including as a standalone dish, paired with sauerkraut and mustard, or as a filling for delicious sandwiches.
For a delightful serving option, consider slicing the baked Kielbasa into bite-sized pieces and arranging them on a platter with a side of tangy sauerkraut and a dollop of spicy mustard for dipping. This presentation adds an interactive element to the meal, allowing guests to create their own flavor combinations.
If you’re looking to elevate your sandwich game, try pairing the baked Kielbasa with caramelized onions, melted cheese, and a drizzle of barbecue sauce on a crusty baguette. The sweetness of the onions and the smoky tang of the barbecue sauce complement the hearty flavors of the sausage, creating a mouthwatering experience.
How to Store Baked Kielbasa?
After baking Kielbasa, store any leftovers in an airtight container in the fridge to maintain freshness and flavor for future consumption.
Choosing the right container is crucial when storing Kielbasa. Opt for a container that seals tightly to prevent air exposure, which can lead to flavor loss and potential spoilage. Ensure that the airtight container is clean and dry before placing the Kielbasa inside, as moisture can promote bacterial growth. Remember to slice the sausage into smaller portions for easier reheating and serving.
When refrigerating, place the airtight container on a shelf rather than in the door to maintain a more consistent temperature. It’s recommended to consume the leftover Kielbasa within 3-4 days for optimal quality. By following these storage recommendations, you can prolong the shelf life of your baked Kielbasa and enjoy it at its best.
Conclusion

Credits: Poormet.Com – Arthur Garcia
Baking Kielbasa is a versatile cooking method that allows you to explore diverse flavors and serving options to suit your personal taste preferences.
One of the key benefits of baking Kielbasa is that it locks in the juices of the sausage, resulting in a moist and flavorful end product. This method also allows for easy customization by adding various herbs, spices, or glazes to enhance the taste.
In terms of serving Kielbasa, you can opt for a simple presentation by pairing it with classic sides like sauerkraut, mustard, and potatoes, or get creative by incorporating it into pasta dishes, casseroles, or even as a topping for pizza.
Frequently Asked Questions
How to Bake Kielbasa?
What is kielbasa?
Kielbasa is a type of Polish sausage made from ground pork, beef, or a combination of both. It is often flavored with garlic, herbs, and spices.
How to Bake Kielbasa?
Do I need to preheat the oven before baking kielbasa?
Yes, it is important to preheat the oven to the recommended temperature before baking kielbasa. This ensures even cooking and prevents the sausage from drying out.
How to Bake Kielbasa?
What temperature and how long should I bake kielbasa?
The recommended temperature for baking kielbasa is 375°F (190°C). The cooking time will vary depending on the size and thickness of the sausages, but generally it takes about 20-25 minutes.
How to Bake Kielbasa?
Can I use a baking sheet to bake kielbasa?
Yes, a baking sheet is a great option for baking kielbasa. Make sure to line the sheet with parchment paper or foil to prevent the sausages from sticking.
How to Bake Kielbasa?
Can I use a slow cooker to bake kielbasa?
Yes, you can use a slow cooker to bake kielbasa. Simply add the sausages to the slow cooker with a little bit of liquid (such as beer or broth) and cook on low for 4-6 hours.
How to Bake Kielbasa?
What are some recommended side dishes to serve with baked kielbasa?
Some delicious side dishes to serve with baked kielbasa include sauerkraut, roasted vegetables, mashed potatoes, or a fresh salad. You can also serve it on a bun with your favorite toppings for a tasty kielbasa sandwich.