How to Cook Pinto Beans After Soaking?
Are you looking to elevate your cooking skills and create delicious meals with pinto beans?
In this article, we will explore everything you need to know about soaking and cooking pinto beans to perfection. From the benefits of soaking to the step-by-step process of preparing and cooking soaked pinto beans, we’ve got you covered. Follow these tips and tricks to ensure your pinto beans turn out perfectly every time.
Let’s get started on your culinary journey with pinto beans!
Key Takeaways:
What Are Pinto Beans?
Pinto beans are a type of legume known for their creamy texture and versatility in various dishes, especially in Texas and Mexican-style cuisines. Pinto beans can be cooked using different methods like stovetop, slow cooker, Instant Pot, or pressure cooker, offering a delicious and flavorful addition to meals.
Why Soak Pinto Beans Before Cooking?
Credits: Poormet.Com – Wayne Thompson
Soaking pinto beans before cooking is essential to ensure they cook evenly, reduce cooking time, and improve their texture. The soaking process helps the beans rehydrate, allowing them to become tender and flavorful when cooked.
When pinto beans are soaked in water, it softens their tough outer skin, making them easier to digest. This can help prevent digestive discomfort that some people may experience when eating beans. Soaking pinto beans can also remove some of the indigestible sugars that cause gas and bloating, making them a more stomach-friendly option. The rehydration process from soaking also helps the beans cook more evenly, leading to a creamy and consistent texture.
What Are the Benefits of Soaking Pinto Beans?
The benefits of soaking pinto beans include faster cooking times, improved texture, and increased tenderness when cooked. Soaking helps to break down complex sugars that can cause digestive discomfort and allows for a more even cooking process.
When pinto beans are soaked, they rehydrate, allowing them to cook more quickly and evenly. This not only saves time in the kitchen but also ensures that the beans are cooked to perfection, neither undercooked nor mushy. Soaking helps to soften the beans, resulting in a creamy texture that enhances the overall dish.
The soaking process can aid in reducing the gas-producing compounds present in beans, making them easier to digest. By soaking pinto beans before cooking, individuals may experience fewer digestive issues commonly associated with legumes.
The simple step of soaking pinto beans before cooking can significantly improve the cooking experience, yielding delicious, well-textured beans that are easier on the digestive system.
How Long Should You Soak Pinto Beans?
The ideal soaking time for pinto beans is typically 8 hours or overnight, ensuring they are adequately hydrated before cooking. Longer soaking times can further enhance the beans’ tenderness and reduce cooking time.
Soaking pinto beans for the recommended duration of 8 hours or overnight is crucial for several reasons. Soaking helps to remove indigestible sugars and complex starches from the beans, making them easier on the digestive system. This process not only enhances the texture of the beans but also improves their overall flavor profile.
Soaking pinto beans adequately ensures that they cook more evenly. Properly hydrated beans require less time to soften during cooking, leading to a more efficient cooking process. This can be especially beneficial when preparing dishes with time constraints or in need of quick, flavorful meals.
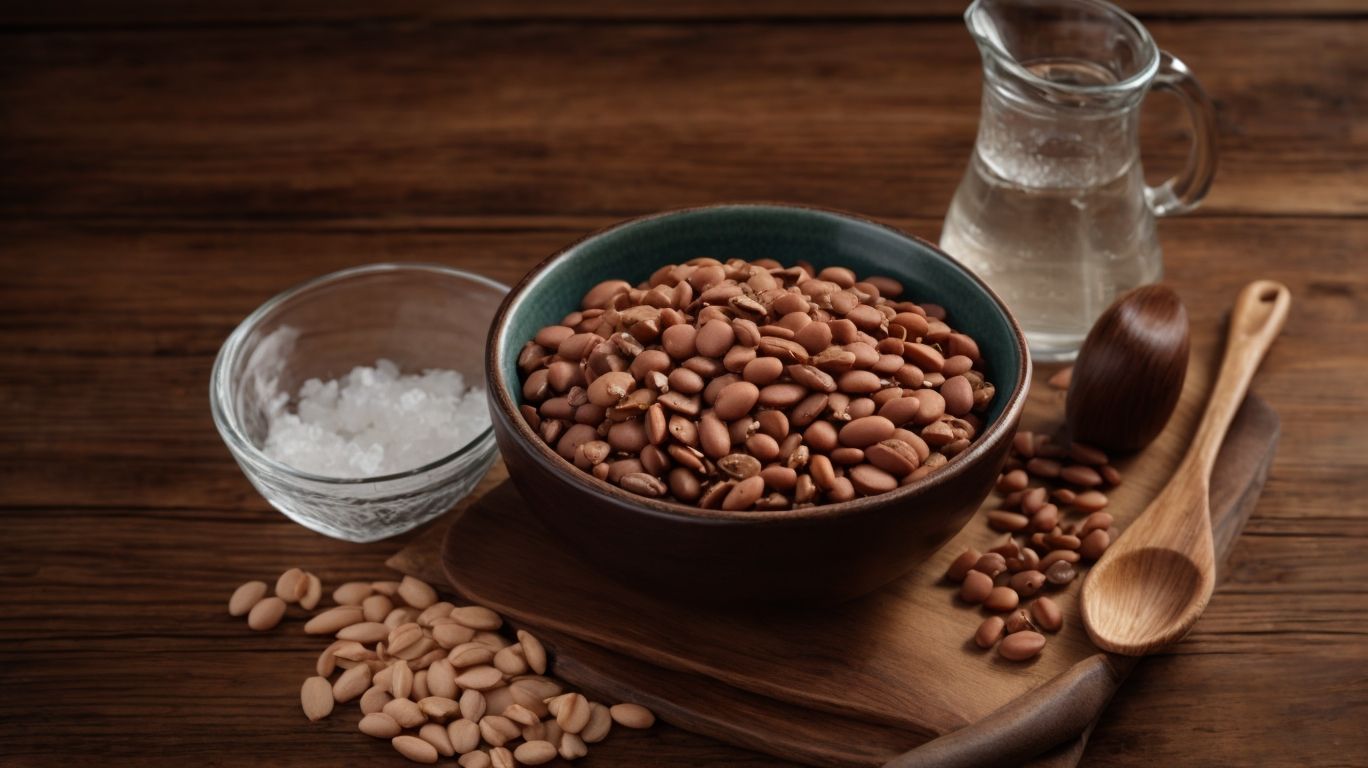
How to Soak Pinto Beans?
To soak pinto beans, start by sorting and rinsing them to remove any debris. Then, cover the beans with water, add seasonings if desired, and let them soak for the recommended time to ensure optimal hydration before cooking.
When sorting the beans, spread them out on a flat surface and remove any discolored or shriveled beans, along with any small stones or dirt that may be present. After rinsing them in a colander under cold running water to wash away dirt and impurities, transfer the beans to a large bowl or pot. Ensuring that the beans are fully submerged in water is crucial to their rehydration process, so add about 3 cups of water for every 1 cup of dried pinto beans. If you want to enhance the flavor, consider adding in aromatics like garlic, onions, or bay leaves.
- Common seasonings include salt, pepper, cumin, or chili powder.
Let the beans soak for at least 4 hours or overnight, depending on your preference and cooking schedule, before draining and rinsing them once more before cooking.
Step 1: Sort and Rinse the Beans
Before soaking pinto beans, it’s essential to sort through them to remove any debris or damaged beans. Rinse the beans under cool water to clean them thoroughly and prepare them for soaking.
Inspecting the beans is crucial to ensure that only the best quality ones are used for cooking. Make sure to pick out any stones, twigs, or discolored beans that may have found their way into the batch.
Once you have removed any unwanted items, place the beans in a colander and give them a good rinse under running water. This step helps wash away any dirt or residue that may be present on the beans’ surface.
Properly cleaning the beans sets the foundation for the soaking process, allowing them to rehydrate evenly and cook to the perfect texture.
Step 2: Measure and Add Water
After sorting and rinsing the pinto beans, measure the appropriate amount of water needed to fully cover the beans in a soaking container. Ensure that the beans are submerged to facilitate even hydration.
To determine the water-to-bean ratio, aim for a 1:3 ratio, meaning 1 part beans to 3 parts water. This ensures the beans have enough liquid to absorb without being overwhelmed during soaking. Hydrating the beans fully is crucial for their texture and taste, so make sure the water covers the beans by at least 2 inches to account for expansion. Allow the beans to sit undisturbed for several hours, or overnight, depending on the desired soaking time.
Step 3: Add Salt and Optional Flavorings
To enhance the flavor profile of soaked pinto beans, consider adding salt and optional seasonings like garlic, onion, or herbs during the soaking process. These flavorings can infuse the beans with delicious aromas.
Another option for seasoning pinto beans is to create a brine solution with salt and spices that can be used as a base for soaking. This method allows the beans to absorb the flavors more evenly. You can experiment with adding bay leaves, cumin seeds, or smoked paprika to the soaking liquid to impart a unique taste. Marinating the beans in a mixture of seasonings before cooking can further elevate the dish’s taste by intensifying the flavors.
Step 4: Cover and Let Soak
After adding water and seasonings, cover the container with a lid or plastic wrap to prevent evaporation and contamination. Let the pinto beans soak for the recommended time to ensure they are fully hydrated before cooking.
Proper hydration is essential during this soaking process, as it softens the beans, making them easier to cook and digest. Ensuring that the container is well-sealed helps retain moisture, allowing the beans to absorb water evenly. This step also enhances the flavor of the beans by allowing them to soak up the seasonings.
By covering the container securely, you protect the beans from any external elements that could affect their quality. The moisture retention achieved through this covering method aids in the absorption of flavors while maintaining the beans’ texture for a delicious end result.
How to Cook Soaked Pinto Beans?
Once pinto beans are soaked, drain and rinse them to remove excess water and prepare them for cooking.
After draining and rinsing the soaked pinto beans, transfer them to a pot or pressure cooker. Add enough fresh water to cover the beans by about an inch. It’s important to use fresh water to ensure the beans cook evenly and absorb flavors properly.
Place the pot over medium heat and bring the water to a gentle simmer. Reduce the heat to low and cover the pot partially with a lid. Allow the beans to simmer gently for about 1-2 hours or until they are tender.
During the simmering process, you may need to periodically check the water level and add more if needed to ensure the beans are fully submerged. This will prevent them from sticking or burning at the bottom.
Once the pinto beans are cooked to the desired tenderness, it’s time to season them. Taste the beans and adjust the seasoning accordingly. You can add salt, pepper, garlic powder, onion powder, cumin, or any other spices of your choice to enhance the flavor.
Step 1: Drain and Rinse the Soaked Beans
After soaking pinto beans, it’s crucial to drain and rinse them to remove any excess water and residue. This step prepares the beans for the cooking process by ensuring they are clean and ready for further preparation.
Draining and rinsing the soaked pinto beans not only helps in maintaining cleanliness but also aids in removing any unwanted residue that might have accumulated during soaking. By washing the beans thoroughly, you are essentially eliminating any impurities that could affect the taste and texture of the final dish.
This process plays a significant role in pre-cooking preparation by reducing the moisture content in the beans. Excess moisture can lead to prolonged cooking times and potentially affect the overall consistency of the dish. Thus, draining and rinsing the beans sets the foundation for a successful cooking experience, allowing you to control the moisture levels more effectively.
Step 2: Add Fresh Water and Bring to a Boil
After draining and rinsing soaked pinto beans, add fresh water to cover the beans in a pot or cooker. Bring the water to a boil to kickstart the cooking process and prepare the beans for simmering until they reach the desired tenderness.
To ensure that the beans are fully submerged, make sure the water level stays above the beans throughout the cooking process. It’s important to replenish the water if it evaporates too quickly, maintaining a consistent level to ensure even cooking. By simmering the beans slowly over low to medium heat, you allow them to soften gradually while absorbing flavors from any seasonings or ingredients you’ve added. This gradual cooking process not only enhances the taste but also helps the beans retain their shape and texture.
Step 3: Reduce Heat and Simmer
Once the pinto beans have been brought to a boil, reduce the heat to a simmer to cook them gently and retain their texture. Simmering allows the beans to absorb flavors and seasonings while becoming tender.
The key to achieving perfectly simmered pinto beans is maintaining a gentle heat throughout the cooking process. Adjust the temperature as needed to ensure the beans are cooking at a low, consistent simmer. This slow cooking method helps the beans gradually soften without breaking apart.
During the simmering phase, the beans start soaking up the aromatic broth or seasoning in which they are cooked. This infusion of flavors adds depth and complexity to the beans, enhancing their overall taste.
Step 4: Check for Doneness and Season to Taste
To ensure the pinto beans are cooked to perfection, periodically check for doneness by tasting a bean for tenderness. Adjust the seasoning to taste by adding salt, herbs, or spices as needed for a flavorful dish.
Once you’ve taken a bite to assess the bean’s tenderness, pay attention to the level of seasoning.
Seasoning plays a vital role in enhancing the overall flavor profile of the dish. If you feel the beans lack depth, consider incorporating complementary flavors like cumin, paprika, or even a hint of citrus for that extra zing. Remember, seasoning should not overpower the natural taste of the beans but rather accentuate it. Experiment with small adjustments until you achieve the perfect balance that tantalizes your taste buds.
Tips for Cooking Perfect Pinto Beans
Cooking perfect pinto beans requires attention to key details like using fresh beans, proper seasoning, adding acid at the end, and storing them correctly for future use. These tips ensure flavorful and well-cooked beans every time.
To start with, when selecting fresh pinto beans, look for ones that are plump, firm, and free from any cracks or blemishes. Quality beans are essential for a delicious end result. For seasoning, consider using a mix of spices like cumin, garlic, and chili powder to enhance the flavor profile. Adding a touch of acidity, such as a splash of vinegar or a squeeze of lemon juice, at the end of cooking can brighten up the dish. When storing cooked beans, it’s best to keep them in an airtight container in the fridge to maintain freshness. When reheating, do so gently over low heat to prevent the beans from becoming mushy.
Use Fresh Beans
Fresh beans are essential for cooking perfect pinto beans as they ensure optimal texture, flavor, and cooking consistency. Using fresh beans enhances the overall quality of the dish and results in a delicious culinary experience.
When selecting fresh beans, look for ones that are firm to the touch and free from wrinkles or blemishes. The quality of the beans directly impacts the final result, with freshly picked beans providing a superior taste and mouthfeel.
By starting with top-quality ingredients, such as fresh beans, you set the foundation for a dish that will impress even the most discerning palates. The vibrant colors and robust flavors that fresh beans offer elevate the dish to a whole new level.
Don’t Overcrowd the Pot
Avoid overcrowding the cooking pot when preparing pinto beans to allow for even heat distribution and proper cooking. Overcrowding can lead to uneven cooking and affect the beans’ texture and overall quality.
When the pot is overcrowded, the beans are not able to move and circulate freely, leading to some beans being undercooked while others are overcooked. Maintaining an appropriate amount of space between the beans ensures that they cook uniformly, resulting in a consistent texture throughout.
By overcrowding the pot, you also risk creating a steaming effect rather than proper cooking. This can result in mushy beans with a loss of flavor and a less appealing appearance. Properly managed pot space allows the beans to simmer gently and absorb flavors more effectively.
Season Generously
Seasoning pinto beans generously with herbs, spices, and aromatics enhances their flavor profile and elevates the dish. Generous seasoning adds depth and complexity to the beans, creating a delicious and aromatic outcome.
This flavor enrichment is a result of the combination of different herbs and spices working together harmoniously to create a symphony of tastes. The process of seasoning allows for the development of layers of flavors, slowly infusing the beans with unique taste profiles. By generously seasoning the pinto beans, you not only enhance their taste but also elevate the overall culinary experience, transforming a simple dish into a gastronomic delight.
Add Acid at the End
Incorporating acid, such as vinegar or citrus juice, towards the end of cooking pinto beans can brighten the flavors and balance the dish. Adding acid adds a refreshing touch and enhances the overall taste of the beans.
When you add a splash of acidity to your pinto beans just before finishing the cooking process, you introduce a burst of freshness that cuts through the richness of the beans, creating a more vibrant and dynamic flavor profile. The acidic element acts as a subtle enhancer, elevating the natural earthiness of the beans while providing a harmonious balance between savory and tangy notes.
By incorporating acid at the end of cooking, you can fine-tune the dish to your preference, adjusting the level of tartness to suit your taste buds and achieving the desired level of culinary acidity. This small yet impactful addition not only improves the taste of the beans but also imparts a sophisticated depth of flavor that distinguishes a well-crafted dish.
Store and Reheat Properly
For optimal storage and reheating of leftover pinto beans, ensure they are cooled and stored correctly in airtight containers.
Once your cooked pinto beans have cooled after initial preparation, transfer them into these airtight containers to protect them from moisture and odors in the fridge. It’s advisable to store them in portions for easy access during meal prep. When it’s time to reheat, opt for gentle methods like stovetop reheating or microwave on low power to prevent them from becoming too mushy.
Frequently Asked Questions
How do I properly soak pinto beans before cooking?
To soak pinto beans, place them in a large bowl and cover with 2 inches of water. Let them soak for at least 8 hours or overnight. Drain and rinse the beans before cooking.
What is the purpose of soaking pinto beans before cooking?
Soaking pinto beans helps to soften them and reduce their cooking time. It also helps to remove some of the indigestible sugars that can cause digestive discomfort.
Can I soak pinto beans for too long?
Yes, you can soak pinto beans for too long. Ideally, they should soak for 8 hours or overnight. Soaking them for longer than 12 hours can cause them to become mushy and lose their flavor.
Do I need to add anything to the water when soaking pinto beans?
No, you do not need to add anything to the water when soaking pinto beans. Simply cover them with enough water to fully submerge them.
What is the best way to cook pinto beans after soaking?
After soaking, drain and rinse the beans and place them in a pot with fresh water. Bring the water to a boil, then reduce to a simmer and cook for about 60-90 minutes, or until the beans are tender.
Can I use the soaking water to cook pinto beans?
No, it is not recommended to use the soaking water to cook pinto beans. This water may contain indigestible sugars and other compounds from the beans, which can result in digestive discomfort.